How to Install Metal Roofing: A Property Owner’s Guide

If you’re wondering how to install metal roofing and what the process actually involves, you’re in the right place. Whether you’re managing storm recovery for a commercial property or planning a long-term upgrade for your home, understanding the installation process can help you make smarter, more confident decisions.
This metal roofing installation guide walks you through what to expect from professional metal roof installation—step by step—so you can evaluate your options with clarity and avoid costly surprises.
Here’s what we’ll cover:
- What to Know Before Installing a Metal Roof
- Step-by-Step Overview of the Metal Roof Installation Process
- Residential vs. Commercial Metal Roofing: What’s Different?
- How Much Does Metal Roof Installation Cost?
- Common Pitfalls to Avoid When Installing a Metal Roof
- Why Work With a Professional Roofing Contractor
- Conclusion: Know What to Expect, Plan with Confidence
First, let’s understand the key things every property owner should know before installation begins.

What to Know Before Installing a Metal Roof
Before a single panel goes up, it’s critical to ensure your property is ready for a successful metal roof installation. Whether you’re managing a multi-family complex in Florida or upgrading your home after storm damage, starting with a clear understanding of the prerequisites will save time, money, and stress.
Structural Readiness: Can Your Roof Support the System?
Metal roofs are lightweight compared to tile but still require a solid structural foundation. Your contractor should assess the roof deck for rot, sagging, or water damage—especially in older buildings.
Reinforcement may be needed if you’re switching from asphalt shingles to a standing seam metal roof—learn more about the standing seam metal roof benefits that make it a popular long-term choice.
Tip: For commercial properties with flat or low-slope designs, discuss system compatibility and drainage requirements early in the process.
Roof Pitch and Design Matter
The pitch (angle) of your roof affects both the type of metal roofing system you can use and how it performs over time. For example, standing seam metal roofs work best on pitches of 3:12 or higher, while specialized systems are required for flatter slopes to prevent water intrusion.
- Steep slope (residential): Greater visual appeal, better runoff
- Low slope (commercial): May require additional waterproofing layers or tapered insulation
- Complex rooflines: Require custom flashing and trim work, which can affect labor costs
Knowing your roof pitch helps contractors give accurate installation cost breakdowns from the start—especially when choosing the right roofing professional for the job.
Permits, Codes & Local Compliance
In many regions—especially across Florida—local building codes require permits for metal roofing installation. Your contractor should handle this process and stay compliant with current codes related to wind uplift, fastener spacing, and fire resistance. In hurricane-prone areas, wind damage repair expertise is essential.
For an industry-standard overview of installation codes and best practices, see the National Roofing Contractors Association roofing guidelines.
Commercial insight: If you’re managing multiple properties across states, be sure your contractor understands both state and municipal variations in code compliance.
Weather & Storm Zone Planning
Florida and other Sunbelt states experience high levels of wind, rain, and UV exposure. Choosing storm-resistant roofing and understanding local wind load requirements (often over 150 mph in coastal zones) can make or break your long-term ROI. Installers should guide you through material selections—like galvanized steel roofing or aluminum panels—that perform well under regional stressors.
Key takeaway: Before you install a metal roof, assess your property’s structure, roof pitch, and code requirements—and make sure your contractor is experienced in navigating all three. A strong start ensures the rest of the project stays on time, on budget, and up to code.

Step-by-Step Overview of the Metal Roof Installation Process
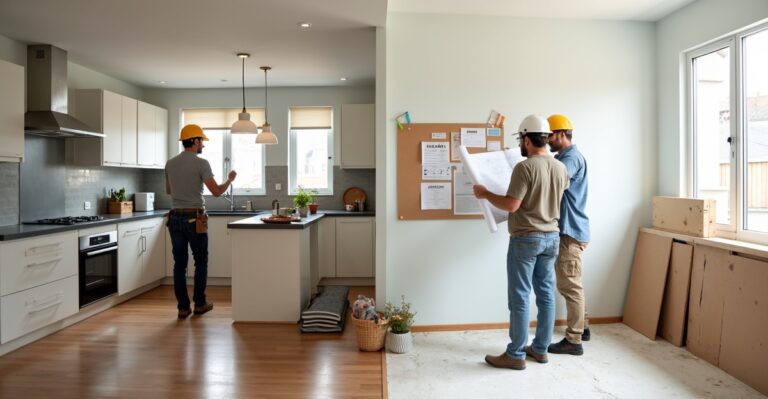
Understanding how to install metal roofing panels isn’t about doing it yourself—it’s about knowing what a professional, high-quality process should look like. Whether you’re overseeing a commercial project or upgrading your residential home, knowing the steps gives you confidence that the job’s being done right, safely, and to code.
Below is a step by step metal roof installation breakdown, covering everything from the initial walkthrough to the final cleanup:
1. Roof Inspection and Estimate
Every successful roofing project starts with a detailed inspection. Your contractor will walk the property, measure the roof size (in square footage), check for structural integrity, and identify any potential problem areas like soft decking or signs of water damage.
Once the inspection is complete, you’ll receive a detailed roofing estimate—breaking down material costs, labor, removal and disposal fees, and any required permits. For commercial buildings or multi-family properties, you may also receive a proposal outlining phased work or scheduling options.
Pro Tip: Look for a contractor who provides itemized estimates and explains options clearly—especially if you’re researching how to install a standing seam metal roof versus other systems.
2. Old Roof Removal and Site Prep
Unless you’re layering over an existing system (which is rare for metal roofing), the old roofing material must be removed. This includes shingles, nails, and any compromised underlayment.
The site is then prepped:
- Roof decking is inspected and repaired if needed
- Safety equipment is installed
- Landscaping and property areas are protected with tarps or barriers
For larger commercial projects, staging zones and equipment placement may also be planned to avoid disrupting daily operations.
3. Underlayment and Waterproofing
Before any panels go up, a weather-resistant underlayment is installed. This layer acts as the first line of defense against moisture and wind. In regions like Florida, contractors may use self-adhering underlayment for added storm protection.
Proper roof waterproofing ensures long-term durability and protects your structure from hidden damage down the road.
Materials commonly used:
- Synthetic roofing underlayment
- Ice and water shield (for valleys and edges)
- Vapor barriers (as needed for insulation performance)
Proper waterproofing ensures long-term durability and protects your structure from hidden damage down the road.
4. Installing the Metal Panels
This is where your roof begins to take shape. Metal panels—cut to size and selected based on your system (e.g., standing seam, corrugated, or ribbed)—are installed with precision, starting at the eaves and working upward, following best practices for how to install metal roofing panels.
Key factors during this stage:
- Proper overlap and alignment
- Secure fastening with corrosion-resistant screws
- Accommodating expansion/contraction of metal due to temperature swings
- Clean, symmetrical layout—especially visible on steep-slope residential roofs
Commercial projects may use different fastening methods, such as mechanically seamed panels or concealed clips.
5. Flashing, Fasteners, and Trim
Once the panels are secured, it’s time to weatherproof the vulnerable points: ridges, valleys, vents, skylights, and chimneys.
This involves:
- Installing roof flashing and edge trim
- Sealing penetrations with high-performance sealants
- Using closures or foam inserts to prevent water or pest intrusion
- Ensuring drip edges and gutters are properly aligned for runoff control
6. Final Inspection and Cleanup
Before calling it complete, a professional contractor will conduct a final walkthrough with you. They’ll double-check all fasteners, verify sealing integrity, and ensure everything aligns with your contract and warranty standards.
For commercial clients, this may include documentation for roof safety assessments.
Finally, the site is cleaned—no debris, no nails, no damage to your property. For commercial clients, this may include a punch list review or final documentation for compliance or asset management records.
Key takeaway: A well-executed metal roof installation follows a clear, professional process—no shortcuts, no guesswork. Knowing each step empowers you to ask the right questions, spot red flags, and hire with confidence.

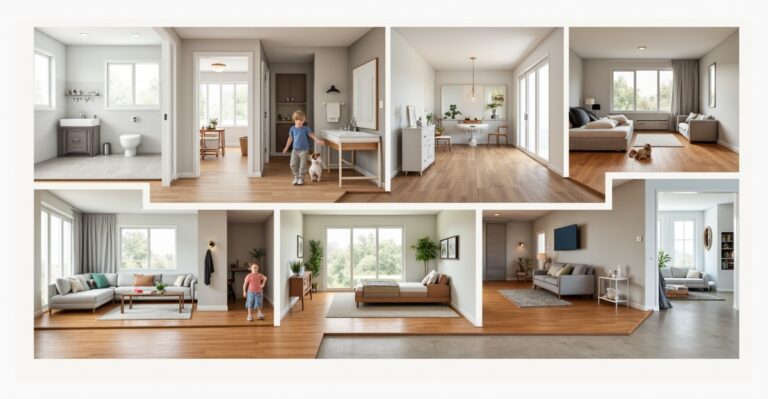
Residential vs. Commercial Metal Roofing: What’s Different?
While the core principles of metal roofing remain the same, the needs of a homeowner in Florida and a commercial property manager overseeing a multi-family building are vastly different. From the materials used to the timeline and code requirements, understanding these differences can help you set realistic expectations—and choose the right contractor for your property type.
Here’s a side-by-side comparison to break it down:
| Aspect | Residential Metal Roofing | Commercial Metal Roofing |
| Roof Size | Smaller, simpler layouts (1,500–3,000 sq. ft.) | Larger, complex structures (10,000+ sq. ft.) |
| Design & Slope | Steeper pitches, visible from street level | Often low-slope or flat, designed for functionality |
| Material Choices | Focus on aesthetics: standing seam, corrugated, aluminum panels | Durability-driven: galvanized steel, coated systems |
| Installation Timeline | Typically 2–5 days | 1–2 weeks or more, depending on scale and phasing |
| Permitting & Codes | Local residential codes, HOA restrictions | Stricter building codes, fire ratings, energy standards |
| Disruption Level | Impacts family/home life during installation | Needs tight coordination to avoid disrupting operations or tenants |
| Warranties & ROI Focus | Emphasis on curb appeal, resale value, and storm protection | Emphasis on asset value, energy savings, and long-term ROI |
Key Considerations for Both Property Types
- Structural Requirements: Commercial roofs often need reinforced decking and support due to larger spans. Residential properties typically require fewer reinforcements unless upgrading from a lightweight material like shingles.
- Code Compliance: Florida’s building codes vary between residential and commercial zoning. Commercial sites often demand more paperwork, engineering documentation, and inspections.
- Access & Logistics: Homes are more straightforward to access. Commercial sites may involve cranes, restricted access hours, or staged materials.
Key takeaway: Residential and commercial metal roofing differ in scale, complexity, and strategy. The best contractors—like RayPro—understand these nuances and adapt their approach to fit your building type, timeline, and compliance needs.

How Much Does Metal Roof Installation Cost?
One of the most common questions property owners ask is, “How much does it cost to install a metal roof?” The answer depends on several key variables, but understanding the typical cost ranges—and what influences them—can help you budget wisely and avoid surprises.
If you’re cost-conscious and exploring alternatives, this guide to cheap metal roofing breaks down budget-friendly material options and trade-offs to consider.
Cost Per Square Foot (Material + Labor)
In general, the total cost to install a metal roof ranges between $8 and $16 per square foot, depending on the material and project complexity. This price includes both materials and labor, but not extras like structural repairs, insulation upgrades, or permits.
Here’s a quick reference chart:
| Roofing System | Average Installed Cost per Sq. Ft. |
| Corrugated Steel Panels | $8 – $11 |
| Standing Seam Metal Roof | $11 – $16 |
| Galvanized Steel Roofing | $9 – $14 |
| Aluminum Roofing Panels | $10 – $15 |
| Zinc Roofing Systems | $14 – $18 |
Note: These figures are averages for both residential and commercial properties. Larger projects may benefit from economies of scale, while complex roof designs could increase labor costs.
Factors That Affect Pricing: Roof Size, Pitch, Material Type
Several elements influence your final quote:
- Roof Size: The larger the roof (in square footage), the more material and labor are required. Commercial properties can span tens of thousands of square feet.
- Roof Pitch & Design Complexity: Steeper slopes or multi-level rooflines increase labor hours and require additional safety measures.
- Material Selection: Standing seam metal offers superior longevity and aesthetics but costs more than basic corrugated panels. Premium metals like aluminum and zinc also command higher prices due to their corrosion resistance and durability.
- Existing Conditions: If your current roof has structural damage, rot, or code violations, those will need to be addressed before installation can begin.
- Location & Regional Code Requirements: Florida homes and buildings, for example, often require wind-rated systems that meet hurricane zone standards, which can add to the total cost.
If your property has structural or leak issues, residential roof repair or reinforcement may be necessary before installation.
For energy savings, you might also consider upgrades like roof insulation during installation.
Financing Options Available Through RayPro
At RayPro, we believe that long-term roofing performance shouldn’t be delayed by short-term budget constraints. That’s why we offer flexible financing options up to $250,000, including:
- Competitive rates and customizable terms
- Quick approval processes
- No prepayment penalties
- Financing for both residential and commercial projects
Our team also provides detailed, transparent estimates upfront, so you’ll know exactly what to expect—no hidden fees or surprise charges.
Key takeaway: Metal roofing is a smart investment, but pricing depends on your property’s specifics. With clear estimates, flexible financing, and materials that last decades, RayPro helps you maximize value while keeping your project on track.

Common Pitfalls to Avoid When Installing a Metal Roof
DIY metal roof installation can be a long-term investment—but only if it’s done right and in full compliance with safety standards and local codes. Cutting corners during the process can lead to leaks, code violations, or costly repairs down the line. Whether you’re managing a commercial site or upgrading your home, it’s important to be aware of the red flags that can signal a problem before it starts.
Here are some of the most common pitfalls property owners should avoid:
Red Flags and Costly Mistakes to Watch For
- Hiring Unlicensed or Uninsured Contractors
Always verify credentials. In many states—especially Florida—roofing work must be completed by licensed professionals. Unlicensed crews may void warranties and expose you to liability. - Skipping Required Permits
Roofing permits ensure your installation meets local code. Skipping this step can result in fines, forced tear-offs, or denial of future insurance claims. - Improper Flashing or Sealing
Flashing protects vulnerable areas like chimneys, skylights, and valleys. Poorly installed flashing is one of the top causes of post-installation leaks, especially during storms. - Incorrect Fastener Use
Using the wrong screws or overdriving them can compromise the roof’s weather resistance. A reliable contractor will use corrosion-resistant fasteners and ensure proper spacing. - Overlooking Roof Pitch Compatibility
Not all metal panels are suited for low-slope roofs. Installing the wrong system can lead to ponding water or premature failure—particularly on commercial buildings. - Lack of Underlayment or Waterproofing
Underlayment isn’t optional. It provides backup protection against moisture and wind-driven rain, especially in storm-prone areas. - No Clear Warranty or Maintenance Plan
If a contractor doesn’t offer a written warranty or explain ongoing maintenance, that’s a red flag. You should know what’s covered, for how long, and what voids the warranty. - Unrealistically Low Bids
If a quote sounds too good to be true, it usually is. Low bids often cut corners on material quality, labor, or safety—and can cost more in repairs later.
Key takeaway: Avoiding these pitfalls starts with choosing a qualified, transparent contractor who follows code, communicates clearly, and stands behind their work. At RayPro, we walk you through every step—permits, warranties, materials—so you can be confident your roof will protect your property for decades to come.

Why Work With a Professional Roofing Contractor
Choosing a professional metal roof installer isn’t just about getting the job done—it’s about getting it done right, safely, and with accountability. Metal roofing requires precision, product knowledge, and adherence to strict codes, especially in storm-prone areas like Florida. Hiring a licensed, insured professional isn’t a luxury—it’s a safeguard for your property and peace of mind.
At RayPro Roofing & General Contracting, we’re not just contractors—we’re project partners. From emergency roof repair to financing and multi-state reliability, we offer comprehensive service.
Ready for a second opinion—or a first impression you can count on? Contact us for a no-obligation quote.
Benefits of Experience, Licensing, and Insurance
A professional contractor brings more than tools to the job—they bring protection:
- Licensed expertise: They understand building codes, material compatibility, and regional compliance requirements.
- Proper insurance: Protects both you and the crew from liability in the event of property damage or injury.
- Trained installation crews: Certified professionals follow manufacturer guidelines, which ensures your roof performs as designed and maintains its warranty.
- Consistent workmanship: Seasoned pros don’t guess. They assess, plan, and execute based on hundreds of completed projects—not trial and error.
What RayPro Offers: Full-Service Approach, Warranties, and Reliability
At RayPro, we’re more than installers—we’re full-service project partners. From initial inspection to final walkthrough, our team handles every detail with professionalism and care.
Here’s what sets us apart:
- Turnkey project management: We manage permits, coordinate crews, oversee quality checks, and keep you informed every step of the way.
- Upfront, transparent pricing: No hidden fees. You get a detailed estimate and clear expectations before work begins.
- Flexible financing options: Get the quality roof you need without financial strain—ask about our plans up to $250,000.
- Industry-leading warranties: Our installations are backed by long-term workmanship and material warranties that we’ll actually stand behind.
- Multi-state reliability: Whether your project is in Florida or any of the 17 states we serve, you get consistent, high-quality service you can trust.
Ready for a second opinion—or a first impression you can count on?
Let RayPro walk your roof and provide a no-obligation quote. It’s honest, detailed, and free.

Conclusion: Know What to Expect, Plan with Confidence
Installing a metal roof is a significant decision—one that affects your property’s protection, value, and long-term maintenance costs. By understanding the professional installation process, key cost drivers, and potential pitfalls, you’re already ahead of the curve. Whether you own a single-family home or oversee multiple commercial properties, being informed helps you hire confidently and plan strategically.
From accurate estimates to storm-ready materials, every step matters. And working with a contractor who’s licensed, experienced, and transparent ensures that your investment pays off for decades—not just a season.
Let RayPro walk your roof and provide a no-pressure estimate—honest, detailed, and free. We’re here to help you protect what matters most, with quality you can see and service you can trust.
Frequently Asked Questions (FAQs)
For most residential properties, a metal roof can be professionally installed in 2 to 5 days, depending on the roof’s size, pitch, and weather conditions. Commercial installations often take longer—1 to 2 weeks or more—due to larger square footage, additional safety protocols, or multi-phase scheduling.
In some cases, yes. Certain metal roofing systems can be installed over an existing shingle roof, but this depends on the condition of the existing structure, local building codes, and load-bearing capacity. RayPro evaluates each property individually to determine whether a full tear-off is recommended for long-term performance and code compliance.
Florida requires a roofing permit for almost all metal roof installations, whether residential or commercial. Your contractor should handle the permitting process and ensure the installation complies with Florida Building Code, including hurricane wind resistance, fastener spacing, and energy efficiency requirements. RayPro manages all permits and inspections as part of our full-service approach.
On average, professional metal roof installation costs between $8 and $16 per square foot, including both materials and labor. The final price depends on the metal type (e.g., standing seam vs. corrugated), roof pitch, structural complexity, and regional requirements.
Often, yes. Commercial buildings typically have low-slope or flat roofs, which require different systems than steep-slope residential designs. Materials like galvanized steel or mechanically seamed panels are common for commercial use, while standing seam or aluminum roofing is more popular in residential projects. RayPro tailors solutions based on each property’s use case, budget, and code requirements.