How to Install a Single Membrane Roof Properly

If you’re planning a single membrane roof install, you’re likely searching for a durable, energy-efficient solution that can stand up to tough weather and protect your property for years to come.
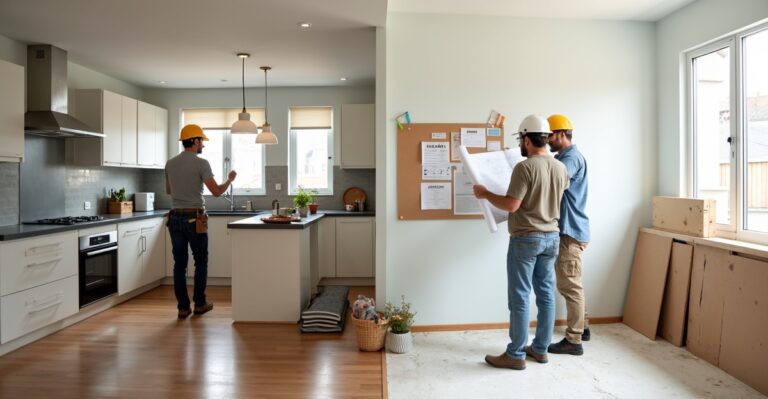
Whether you’re a homeowner dealing with storm damage or a commercial property manager planning to install a single membrane roofing system, knowing what to expect during the installation process is key to making the right decision.
This guide breaks down everything you need to know—from the types of single-ply roofing systems available to the step-by-step process professionals follow. You’ll learn how to prepare your roof, avoid costly mistakes, and understand typical timelines so you can move forward with confidence.
Here’s what we’ll cover:
- What Is a Single Membrane Roof and Why Choose It?
- Preparing Your Roof for Installation
- Step-by-Step Guide to Single Membrane Roof Installation
- Common Installation Mistakes to Avoid
- How Long Does Installation Take?
- Conclusion: Install With Confidence
First, let’s understand what a single membrane roof is—and why it might be the right fit for your building.

What Is a Single Membrane Roof and Why Choose It?
A single membrane roof—also known as a single-ply roofing system—is a durable, weather-resistant solution commonly used for flat and low-slope roofs. Unlike traditional multi-layer roofing systems, single membrane roofs consist of a single, flexible layer of synthetic material that acts as a waterproof barrier.
These systems—such as an EPDM single membrane roof install—are favored for their simplicity, energy efficiency, and long-term performance, making them a smart choice for both residential and commercial buildings.
Whether you’re managing a retail property in a storm-prone area or upgrading your home’s aging flat roof, a single membrane roof install offers reliable protection with minimal maintenance. It’s an ideal choice when considering single membrane roofing for flat roofs that are built to withstand the elements.
Types of Single-Ply Roofing Systems (EPDM, TPO, PVC)
There are three main types of single membrane roofing materials, each with unique benefits:
| Material | Best For | Durability | Cost | Key Strengths |
| EPDM (Ethylene Propylene Diene Monomer) | Commercial and residential buildings needing a budget-friendly solution | 20–30 years | $ | UV resistance, flexibility, low cost |
| TPO (Thermoplastic Olefin) | Energy-efficient retrofits and hot climates like Florida | 15–25 years | $$ | Reflective surface, energy savings, mold resistance |
| PVC (Polyvinyl Chloride) | Restaurants, warehouses, chemical-prone areas | 20–30 years | $$$ | Chemical resistance, strength, fire retardant |
- EPDM roofing installation is ideal when budget and flexibility are top concerns. It’s rubber-based and holds up well in varied climates.
- TPO roofing membrane systems are popular in southern states due to their solar reflectivity, which helps reduce cooling costs. These membranes also integrate well with roof insulation to boost energy savings.
- PVC membrane installation offers superior chemical resistance and strength, making it ideal for restaurants or industrial sites where grease or chemicals may be present.
Key Benefits for Flat or Low-Slope Roofs
Single membrane systems are purpose-built for low-slope roof solutions, where water runoff can be a challenge. These roofs offer:
- Superior waterproofing with heat-welded or adhered seams
- Lower maintenance needs compared to traditional tar-and-gravel systems
- Quick installation times, reducing downtime for businesses or tenants
- Energy efficiency, especially with TPO and PVC membranes that reflect sunlight
- Compatibility with insulation and roof drainage solutions
For commercial buildings undergoing a roof retrofit or for homes needing reliable roof waterproofing, single membrane systems strike the right balance between performance and long-term value.
To get a full picture of what to expect over time, this analysis of the lifespan of a commercial roof offers helpful context for budgeting and maintenance planning.
Key takeaway: If you need a high-performing, low-maintenance roofing solution that’s built to last, a single membrane roof is one of the most effective and proven options available today.

Preparing Your Roof for Installation
Before any membrane is rolled out or seams are welded, a successful single membrane roof install begins with thorough preparation. This phase ensures the roofing system performs as intended—maximizing durability, weather resistance, and long-term value. Whether you’re working with a professional contractor or overseeing a project, understanding what goes into prepping your roof will help you avoid costly setbacks down the line.
Inspection & Substrate Readiness
Every high-quality roof installation starts with a detailed inspection. A contractor will evaluate the existing roofing system (if any), identify damage or wear, and assess whether the substrate—the surface layer beneath the new membrane—is structurally sound and properly sloped for drainage.
Here’s what happens during this step:
- Remove old roofing material, if needed, to expose the deck
- Inspect for rot, cracks, or moisture damage in the decking
- Check slope and drainage systems to ensure water runoff
- Verify building code compliance and permit requirements (especially important in hurricane zones like Florida)
In some cases, the existing roof can be retrofitted if local codes allow it, but only if the underlying layers are in good shape. Skipping this inspection step can lead to seam failures or trapped moisture—problems that undermine the entire roofing system.
For older buildings with visible deterioration, roof refurbishment may be necessary before the membrane install can proceed. And for Florida-based installs, it’s essential to understand Florida Building Code requirements and how they impact membrane roofing choices and attachment methods.
Tools, Materials & Contractor Planning
With a clear assessment in hand, it’s time to organize the materials and steps for installation. The type of membrane you choose (EPDM, TPO, or PVC) will determine the required adhesives, fasteners, and equipment.
Here’s a sample checklist of tools and prep items used during this stage:
- Industrial-grade cleaners and scrapers
- Fasteners or ballast (depending on system type)
- Insulation boards and vapor barriers
- Membrane rolls (cut to fit onsite)
- Heat-welding equipment or adhesives
- Flashing components and edge sealants
- Safety gear and fall protection
- Moisture scanners and seam rollers
You’ll also want to consider roof flashing installation as a critical step in securing edges, vents, and pipe penetrations against leaks.
Attachment method matters:
- Fully adhered membranes use bonding adhesives for a tight, seamless finish.
- Mechanically fastened systems are anchored with screws and plates—ideal for windy zones.
- Ballasted roofs use heavy stones or pavers to weigh down the membrane, mostly in large commercial settings.
A professional contractor will also map out the roofing project timeline, order materials in advance, and ensure everything is staged for an efficient install with minimal disruption.
Key takeaway: Proper inspection and planning are the foundation of a durable, leak-resistant membrane roof. When you get this stage right, the installation goes smoother—and your investment lasts longer.

Step-by-Step Guide to Single Membrane Roof Installation
Now that your roof is inspected, prepped, and ready, it’s time to walk through the actual single membrane roof install process. While professional contractors handle this with precision, understanding each step gives you clarity on what to expect—especially when evaluating timelines, quality, and workmanship.
Here’s how a standard single-ply roofing system is installed, from insulation to final sealing:
1. Installing Insulation and Vapor Barriers
The first layer of the roofing system typically starts with insulation boards, which help improve energy efficiency and provide a stable base for the membrane.
- Common insulation types include polyiso (polyisocyanurate), EPS (expanded polystyrene), or XPS (extruded polystyrene)
- Boards are laid out and staggered to reduce thermal bridging
- A vapor barrier may be installed beneath the insulation to block moisture from rising into the roofing system—especially important in humid climates or buildings with high interior moisture
These layers are fastened or adhered depending on the roof deck and system type.
2. Laying and Securing the Membrane (Adhered, Ballasted, Fastened)
Next comes the installation of the single membrane—whether it’s TPO, EPDM, or PVC.
There are three primary attachment methods:
- Fully adhered systems: The membrane is glued directly to the insulation using bonding adhesive. This offers a smooth finish and strong wind resistance.
- Mechanically fastened systems: The membrane is secured with screws and plates along the seams, then overlapped and sealed. Ideal for large, open commercial spaces.
- Ballasted systems: After loose-laying the membrane, heavy stones or pavers are used to hold it in place. This method is less common today and mainly used on larger, flat commercial roofs with structural capacity.
If you’re retrofitting after a severe weather event, make sure to review options for wind damage repair and single membrane roof repair before choosing an attachment method.
3. Heat-Welding or Sealing Seams
Once the membrane is in place, the seams—where two rolls overlap—must be sealed for waterproofing.
- TPO and PVC seams are typically heat-welded using specialized hot-air equipment, creating a permanent bond
- EPDM seams may use primer and seam tape, or liquid adhesives depending on manufacturer specs
Proper seam sealing is crucial. A weak weld can lead to leaks, especially in high-wind or heavy-rain regions like Florida.
To ensure integrity, contractors often perform roof leak detection using probes or thermal imaging.
4. Flashing, Edges, and Drainage Details
The final step involves securing all perimeter areas, penetrations, and drainage points:
- Flashing is applied around pipes, vents, HVAC units, and parapet walls to prevent leaks
- Termination bars or metal edging are used to secure the membrane at the roof’s edges
- Drains, scuppers, and gutters are checked or upgraded to handle water runoff efficiently
Inadequate flashing or poor drainage planning can undermine the entire roofing system—so this step should never be rushed. Check if your existing gutters require gutter replacement to fully optimize the system.
Key takeaway: A professional single-ply membrane roof installation follows a precise sequence—from insulation and attachment to seam sealing and edge protection. When done right, it results in a durable, energy-efficient, and low-maintenance roof that performs for decades.

Common Installation Mistakes to Avoid
Even the best roofing materials can fail if they’re installed incorrectly. When it comes to a single membrane roof install, cutting corners—whether through DIY attempts or hiring the cheapest contractor—can lead to expensive problems down the line. Understanding the most common mistakes helps you make informed decisions and ensures your roof performs as it should for years to come.
1. Weak Seams or Inconsistent Fastening
Seams are the most vulnerable part of any single-ply roofing system. If they’re not properly welded, taped, or adhered, water can seep through, compromising insulation and damaging the structure below.
Common issues include:
- Incomplete or uneven heat-welding
- Skipped fasteners in mechanically fastened systems
- Misaligned overlaps that create gaps or tension
Why it matters: Seam failures are the top cause of premature membrane leaks. A certified contractor should always perform seam integrity checks using probes or thermal tools before project sign-off.
2. Poor Drainage Planning or Slope Issues
Flat or low-slope roofs demand careful drainage design. A membrane roof can only perform if water flows off efficiently. Improper slope or clogged drainage points can result in ponding water—leading to leaks, membrane damage, or structural stress.
If you notice pooling water after storms, consider scheduling a roof inspection before moving forward with membrane installation.
Avoid these drainage pitfalls:
- Failing to install tapered insulation to create slope
- Underestimating the number of drains or scuppers needed
- Allowing debris to block gutters or downspouts
Why it matters: Water that lingers on a membrane surface weakens seams over time and may void warranties. Proper drainage is especially critical in rain-heavy or hurricane-prone regions like Florida.
3. Skipping Permits or Wind Resistance Standards
In some areas, especially across Florida and coastal states, building codes and wind uplift ratings are strict—and for good reason. Overlooking permitting or skipping wind-rated attachment methods can result in fines, insurance issues, or total roof failure in a storm.
Risks include:
- Using attachment methods that don’t meet local wind zone ratings
- Avoiding code-required inspections
- Not securing a roofing permit (which may be required for insurance claims)
Why it matters: Roofs not up to code are a liability. Working with a licensed contractor ensures your installation meets FBC (Florida Building Code) or regional standards—protecting both your investment and your safety.
Top 3 Mistakes to Watch Out For:
- Poor seam sealing or weak fastener patterns
- Inadequate drainage slope or planning
- Skipping permits or code requirements in high-wind zones
Key takeaway: Avoiding these common mistakes is just as important as choosing the right roofing material. Work with experienced, licensed professionals who understand code compliance, local weather demands, and best installation practices—so your new membrane roof lasts as long as it should.

How Long Does Installation Take?
One of the most common questions during a single membrane roof install is, “How long will this take?” The answer depends on a variety of factors—from the size and complexity of your building to local weather and permitting requirements. Knowing what to expect helps you plan around disruptions and ensures the project stays on track.
Factors That Influence Duration (Weather, Size, Permits)
Every roofing project is unique, but here are the main elements that can affect installation time:
- Roof Size & Accessibility: A 2,000 sq. ft. residential roof is far quicker to complete than a 100,000 sq. ft. warehouse. Access to the roof (e.g., flat vs. multi-level) also impacts speed.
- Weather Conditions: Rain, humidity, and high winds—especially in regions like Florida—can delay progress or halt work temporarily. Membrane adhesives and welding require dry conditions to perform properly.
- Material Type & Attachment Method: Fully adhered systems may take longer due to curing time, while mechanically fastened membranes move faster with experienced crews.
- Permitting & Inspections: Some municipalities require multiple inspections throughout the job. Delays in approval or inspection scheduling can stretch out timelines.
- Crew Size & Experience: A skilled contractor with a full team can complete a project much faster than a smaller or less experienced crew.
If you’re dealing with damage from a recent storm, explore Storm Damage Repair options to assess if emergency measures are needed before full installation begins.
Typical Timelines for Residential vs. Commercial Projects
While every project is different, here’s a general idea of how long your installation might take:
| Project Type | Average Timeline |
| Small Residential Roof (1,500–2,500 sq. ft.) | 2–4 days |
| Medium Commercial Roof (10,000–25,000 sq. ft.) | 1–2 weeks |
| Large Commercial or Industrial Roof (50,000+ sq. ft.) | 2–4+ weeks |
These estimates assume favorable weather and a prepared site. Delays due to material availability, inspection schedules, or unforeseen deck repairs can add a few days or more.
Key takeaway: While a residential membrane roof might be completed in under a week, larger commercial projects require more time and coordination. Working with an experienced contractor like RayPro Roofing & General Contracting helps keep your project on schedule—with clear communication, proactive planning, and minimal disruption to your operations.

Conclusion: Install With Confidence
A successful single membrane flat roof installation doesn’t just come down to the materials—it’s about the process, the preparation, and the people behind the project. From selecting the right membrane system (EPDM, TPO, or PVC) to proper substrate prep, careful seam sealing, and drainage planning, every step plays a role in how well your roof performs over time.
Whether you’re a homeowner looking for energy efficiency and peace of mind, or a commercial property manager planning a major retrofit, knowing what to expect during installation helps you make informed decisions—and avoid costly mistakes.
With over 17 years of experience across 17 states, RayPro Roofing understands what it takes to deliver long-lasting, code-compliant, storm-resistant roofing systems with minimal disruption. Our team handles every detail—from inspection and permits to final cleanup—so you don’t have to.
Want a no-pressure quote or site walk? Contact Us—RayPro is ready to help you plan the perfect install—on time and on budget.
Frequently Asked Questions (FAQs)
A properly installed single membrane roof can last 20 to 30 years depending on the material, climate, and maintenance. EPDM typically lasts the longest, while TPO and PVC offer strong performance with added benefits like reflectivity and chemical resistance. Regular inspections and timely repairs can help maximize lifespan.
TPO (Thermoplastic Olefin): Reflective, energy-efficient, and mold-resistant—great for hot climates.
PVC (Polyvinyl Chloride): Strong, chemical-resistant, and fire-retardant—ideal for industrial or food service settings.
EPDM (Ethylene Propylene Diene Monomer): Durable, flexible, and budget-friendly—commonly used on residential or standard commercial buildings.
Each has unique strengths depending on your building’s needs, climate, and budget.
While technically possible, DIY installation isn’t recommended. Proper membrane alignment, seam welding, insulation, and drainage planning require professional tools and experience. Mistakes can lead to leaks, code violations, and warranty voids—especially in regulated states like Florida.
Costs vary widely depending on project size, location, material type, and attachment method. On average:
Residential projects: $6–$12 per square foot
Commercial projects: $5–$10 per square foot (larger scale = lower per-foot cost)
Additional costs may include insulation, tear-off of old materials, and compliance with local permitting.
Yes—when properly installed and fastened, single-ply systems are highly effective in storm-prone areas. TPO and PVC, in particular, are heat-welded for strong seam integrity, and mechanically fastened systems can be engineered to meet Florida Building Code wind uplift requirements. Always work with a licensed contractor familiar with regional codes and hurricane resilience.