How to File a Roof Insurance Claim Step-by-Step

Filing a roof insurance claim can feel overwhelming—especially when you’re already dealing with storm damage or unexpected repairs. Whether you’re a homeowner or a commercial property manager, having the right roof insurance claim tips can make the difference between a smooth process and a stressful one. In this guide, we’ll walk you through each step clearly, so you know what to expect, how to protect your investment, and when to get professionals like RayPro involved.
Here’s what we’ll cover:
- Understanding When to File a Roof Insurance Claim
- Step-by-Step Guide to Filing a Roof Insurance Claim
- Common Challenges and How to Handle Them
- Residential vs. Commercial Claims: What’s Different?
- What About Solar Panels? Detach & Reset in Claims
- Roof Insurance Claim Tips to Maximize Your Coverage
- Conclusion: You Don’t Have to Navigate This Alone
First, let’s understand when it actually makes sense to file a claim—and what kind of damage qualifies.
Understanding When to File a Roof Insurance Claim
Not all roof damage needs to go through insurance—but if you’re wondering should I file an insurance claim for my roof, some absolutely should. Knowing when to file a roof insurance claim can save you from paying out of pocket for repairs that may be fully or partially covered. The key is acting quickly, documenting thoroughly, and understanding what your policy actually protects.
Signs of Roof Damage to Look For After a Storm
Storms are one of the leading causes of roof damage—and often the trigger for most insurance claims. After a major weather event, it’s smart to check for visible signs of damage from the ground first. Here’s what to look for:
- Missing or curled shingles
- Dark spots or bruising on shingles (common after hail)
- Water stains on ceilings or walls inside the building
- Debris buildup in gutters or near downspouts
- Visible dents on vents, flashing, or metal roofing
In commercial buildings, damage might not be visible from the ground at all—especially with flat or membrane roofs. That’s where a professional inspection and a detailed roof inspection report come in. Don’t assume everything is fine just because there’s no leak yet. Hail damage assessment and subtle storm-related issues can take time to show up but may still qualify for coverage.
When Does Insurance Typically Cover Roof Damage?
Most property insurance policies cover sudden, accidental roof damage from events such:
- Hailstorms
- Windstorms and hurricanes
- Falling trees or debris
- Fire
- Vandalism
This is true for both homeowner’s insurance coverage and commercial property insurance, though the fine print can vary depending on your carrier and policy type. In many cases, policies will cover the cost to repair or replace the damaged portion of the roof, minus your deductible.
If your roof is newer or well-maintained, the odds of getting full coverage are much higher. If it’s older or already showing signs of wear, you might be looking at a reduced payout—something we’ll cover later when discussing ACV (Actual Cash Value) vs. RCV (Replacement Cost Value).
What Isn’t Covered?
Unfortunately, not all damage is insurable. Common exclusions include:
- Normal wear and tear due to age or poor maintenance
- Leaks caused by long-term neglect
- Damage from pests, mold, or rot
- Manufacturer or installer defects
- Any issues that existed before your policy began
These fall under what insurers often refer to as policy limits and exclusions. Simply put, insurance is designed to cover unexpected damage—not maintenance or pre-existing problems.
That’s why routine inspections matter. They create a history of roof health and help you catch small issues before they lead to denied claims.
Key Takeaway: Progressive notes that homeowners insurance typically covers roof damage from covered perils such as wind or hail—but filing promptly helps strengthen your case. A fast, professional inspection can help confirm whether the damage is claim-worthy, document the evidence, and give you the facts you need to move forward confidently.
Step-by-Step Guide to Filing a Roof Insurance Claim
Filing a roof insurance claim isn’t something most property owners do often—but when the time comes, you want to get it right. Whether you’re managing a multi-site commercial property or taking care of your family home, this step-by-step guide will walk you through the process, avoid common pitfalls, and help you get the coverage you deserve.
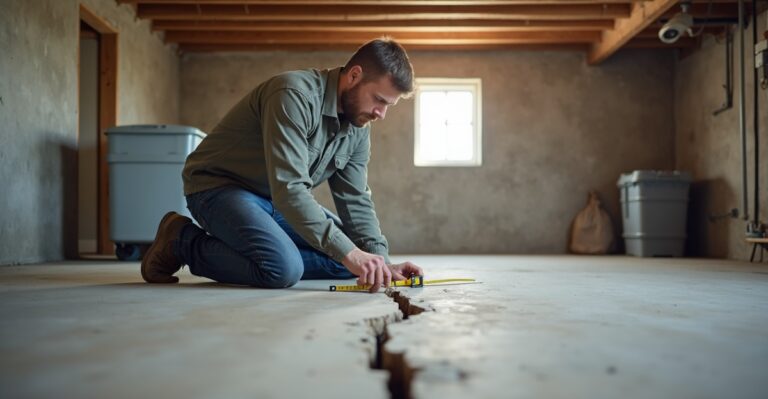
Step 1: Inspect the Damage (and Stay Safe)
After a storm or incident, the first priority is safety. If you suspect damage—especially after hail, high winds, or flying debris—do a visual check from the ground. Don’t climb onto the roof yourself.
Look for missing shingles, debris, water leaks, or anything unusual. If water is entering the property, you may need to arrange for emergency roof tarping to prevent further damage. Quick action now can make a big difference later during claim evaluation.
For commercial buildings, or when the damage isn’t obvious, bring in a professional to complete a formal roof inspection report—a roof inspection for insurance claim documentation is often a key step in the claims process.
Step 2: Document Everything With Photos & Notes
Your insurance company needs proof. Before any repairs begin, take clear, time-stamped photos of the damage from multiple angles—both exterior and interior if leaks are visible. Be thorough.
Also, write down:
- The date and time of the storm or incident
- Weather conditions or events that may have caused the damage
- Any visible damage to roofing, flashing, gutters, vents, or surrounding property
- Whether temporary repairs or tarping were applied
This becomes your insurance claim documentation and will help back up your case with the adjuster.
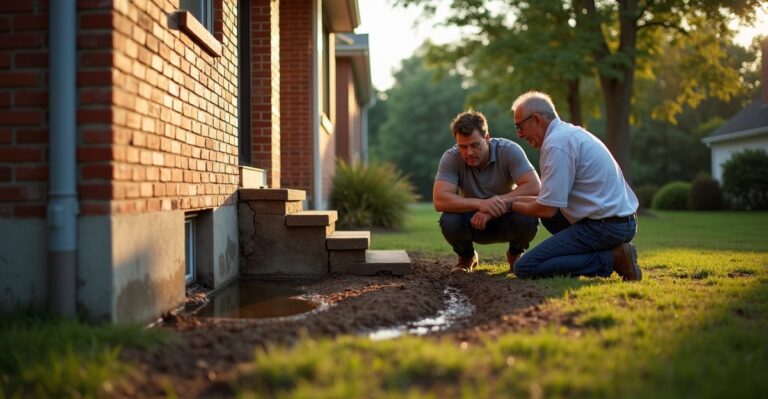
Step 3: Schedule a Professional Roof Inspection
Even if the damage seems minor, it’s smart to get a licensed roofing contractor—like RayPro Roofing—to conduct an in-depth inspection. We’ll check areas the eye can’t see from the ground and provide a detailed roofing contractor estimate to support your claim.
Your contractor’s report should include:
- Photos of the damage
- Descriptions of affected materials
- Scope of work for repairs or replacement
- Estimated cost of repairs
- Timeline for completion
Be sure the contractor is experienced in storm damage and insurance claims—this makes a major difference in how smoothly your claim moves forward.
Step 4: Contact Your Insurance Provider
Once you’ve gathered your evidence and inspection report, it’s time to notify your insurance company. Most policies have a limited window for filing—sometimes as short as 30 days after the damage occurs—so don’t wait.
You’ll likely need to:
- File a claim online or over the phone
- Provide your policy number
- Share documentation and the roofer’s estimate
- Describe the cause and extent of damage
Your insurance company will then assign a claims adjuster to evaluate the damage.
Step 5: Coordinate With the Insurance Adjuster
Your insurance adjuster evaluation is a critical step. This is when the insurer sends someone to inspect the roof and verify your claim. Ideally, your contractor should be present during this visit to advocate for you and ensure all damage is noted.
What the adjuster looks for:
- Evidence of storm or impact-related damage
- Signs of wear and tear vs. sudden damage
- Matching your documentation to what they observe
- Compliance with policy limits
Be respectful but assertive. If something is missed or under-assessed, your contractor can help negotiate or provide supplemental documentation.
Step 6: Review the Settlement Offer
Once the adjuster submits their report, you’ll receive a settlement letter from your insurer. This outlines what they’re willing to pay—based on your policy and their findings.
Here’s where things get technical:
- ACV (Actual Cash Value): What your roof is worth today (factoring in depreciation)
- RCV (Replacement Cost Value): What it would cost to replace your roof at today’s rates
- Roof depreciation schedule: How much value your insurer subtracts based on your roof’s age
Some policies only pay ACV. Others offer RCV but require you to complete the work first and submit final invoices before releasing the full payment. Review carefully, and ask your contractor for help understanding any confusing language.
Step 7: Approve the Work and Begin Repairs
Once you accept the settlement, it’s time to move forward with repairs. Choose a licensed, insured contractor who is experienced with insurance work—not just a quick fix.
If you haven’t done so already, your contractor should:
- Finalize the scope of work
- Schedule materials and labor
- Start repairs within the approved budget and timeframe
- Communicate with your insurer if additional damage is uncovered during repairs
RayPro handles all of this, including required documentation and updates for your insurance provider. Our goal is to get your roof restored quickly, safely, and to code—with minimal disruption to your home or business.
Key Takeaway: The insurance claim process can be detailed—but it doesn’t have to be difficult. When you follow the right steps, stay organized, and work with an experienced contractor, you put yourself in the best position for full and fair coverage.
Common Challenges and How to Handle Them
Even when you follow every step of the insurance claim process, setbacks can happen. From low settlement offers to misunderstandings with adjusters, these challenges are common—but manageable when you know what to expect. Below are some of the most frequent roadblocks our customers face, along with practical ways to handle them.
Low Settlement Offers or Denials
It’s frustrating to receive a settlement that barely covers your repair costs—or worse, to have your claim denied altogether. This usually happens when:
- The insurer classifies damage as “wear and tear” instead of storm-related
- Your documentation lacks detail or key photos
- The adjuster’s assessment doesn’t match the contractor’s estimate
How to respond: Start a claim negotiation process by submitting a “supplement” to the insurance company. This is a request for re-evaluation, often backed by additional evidence or a second inspection.
What to say to your adjuster: Our contractor found additional damage not included in the original assessment. We’re requesting a supplement with updated documentation and photos.
Adjuster Disagreements or Delays
Insurance adjusters play a key role, but their evaluations aren’t always accurate—or timely. Disputes can arise over the extent of damage or what repairs are necessary.
What you can do:
- Ask your contractor to meet the adjuster on-site to explain the scope of work
- Provide side-by-side comparisons of the adjuster’s estimate vs. the contractor’s report
- Stay organized: track dates, names, and outcomes of all conversations
If delays drag on, politely escalate the issue with your insurance company or ask to speak with a supervisor. Consistent follow-up can make a big difference.
Repair vs. Replacement Disputes
One of the biggest gray areas in roof claims is deciding whether to repair or fully replace the roof. Your insurance provider may push for minimal patchwork, while your contractor sees the need for full replacement.
What affects this decision:
- The age and material of your existing roof
- Local building codes or HOA regulations
- The percentage of the roof affected by damage
Most policies require a full replacement if more than a certain percentage—often 25%—is damaged. If you’re facing a repair vs. replacement decision, make sure your contractor provides documentation that justifies why partial fixes won’t be sufficient or code-compliant.
Understanding Your Policy Terms
A surprising number of claims fall apart because of policy fine print. Here are a few terms every property owner should know:
- Deductible for roof insurance: The amount you pay out-of-pocket before coverage kicks in. Some policies have a higher deductible specifically for wind or hail damage.
- Policy limits and exclusions: Caps or clauses that may restrict how much the insurer pays—or what kinds of damage they’ll cover. Examples include cosmetic exclusions for metal roofs or denial of coverage for pre-existing damage.
Before you file a claim, review your policy—or have your contractor help you interpret it. Understanding these terms up front helps you avoid surprises later.
Key Takeaway: Challenges in the claims process are common—but they’re not the end of the road. With the right documentation, professional support, and a clear understanding of your policy, you can navigate these hurdles confidently.
Residential vs. Commercial Claims: What’s Different?
While the core steps of filing a roof insurance claim are similar, the process—and expectations—can vary significantly between residential and commercial properties. Understanding these differences helps ensure the right documentation, budgeting, and coordination are in place from the start.
Whether you’re a homeowner protecting your family home or a facility manager overseeing multiple properties, here’s what to keep in mind.
Differences in Documentation and Compliance
Residential Claims:
Homeowners usually need a basic inspection report, photos of the damage, and a contractor’s estimate. Documentation is often simpler and focused on visible, immediate repairs. Most residential policies are fairly standardized and written for individual properties.
Commercial Claims:
Commercial property claims demand more thorough documentation. Insurers may require:
- Professional roof inspection reports
- Historical maintenance records
- Compliance documentation for fire safety, occupancy codes, or warranty coverage
- Coordination with building management or stakeholders
For institutions like schools or healthcare facilities, compliance isn’t just a requirement—it’s a liability issue. RayPro works with compliance officers and property managers to ensure all reports meet regulatory expectations.
Cost and Coverage Considerations
Homeowners:
Residential policies usually include standard deductibles—often between $500 and $2,500—or a percentage-based deductible for named storms (e.g., 2% of the home’s insured value). If your roof is older, you may only be reimbursed for Actual Cash Value (ACV), rather than the full Replacement Cost Value (RCV).
Commercial Property Owners:
Commercial coverage tends to allow for larger claim amounts but may include:
- Custom deductibles tied to specific asset values
- Coverage caps based on policy tiers or site-specific risk
- Additional exclusions for cosmetic damage, outbuildings, or leased roof systems
Because of the higher dollar amounts involved, documentation and accuracy are key for commercial owners to avoid delayed or reduced payouts.
Commercial Coordination: Multi-Site, Multi-Vendor Complexity
Commercial operations often involve:
- Multiple roofs across different locations
- Third-party vendors (HVAC, solar, IT infrastructure)
- Internal teams or facility management software
- Tight project timelines tied to operations or tenant schedules
All of this creates coordination complexity. RayPro’s commercial clients rely on our centralized project management to minimize disruptions, streamline insurance communications, and ensure quality control across all properties.
Homeowners, by contrast, typically coordinate with one contractor and one insurer—making the process more straightforward but still emotionally significant.
Quick Comparison Table
| Feature | Residential Claim | Commercial Claim |
| Documentation Needed | Photos, inspection, estimate | Reports, compliance docs, maintenance logs |
| Typical Deductible | Flat fee or storm % | Custom per-building or per-event |
| Claim Size | $10K–$100K | $20K–$500K+ |
| Coordination Complexity | Low to moderate | High (multi-vendor, multi-site) |
| Compliance Requirements | Basic (local codes) | Extensive (regulatory, liability, warranty) |
| Decision-Makers | Homeowner(s) | Facility manager, property owner, board |
Key Takeaway: Residential and commercial claims follow similar paths—but the stakes, paperwork, and coordination needs can differ dramatically. Knowing what’s expected for your type of property ensures faster processing and fewer surprises.
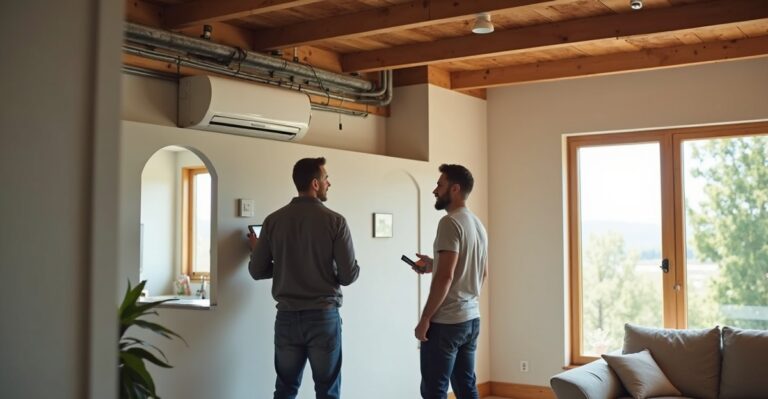
What About Solar Panels? Detach & Reset in Claims
If your property has solar panels, filing a roof insurance claim becomes a bit more complex—but it’s manageable with the right guidance. Many property owners don’t realize that roof repairs involving solar systems require additional coordination and specific claim details. Here’s what you need to know to make sure your solar setup—and your roof—are both protected.
Are Solar Panels Covered in Roof Claims?
In most cases, solar panels are covered under your homeowner’s or commercial property insurance policy, but coverage depends on the cause of damage and how your policy is written. If a storm damages both your roof and your solar array, the cost of removal, inspection, and reinstallation may be included as part of the overall claim.
However, some policies list solar as a separate line item or under a different coverage limit. This is where reading your policy—or asking your contractor to help interpret it—becomes important. You’ll want to confirm whether your insurer covers the following:
- Solar panel roof claim advice: labor and equipment for removal and reinstallation
- Damage caused by debris or hail impacting solar modules
- Roof repairs beneath the array, which typically require panel removal
- Inspection and electrical testing after reinstallation
If coverage is unclear, ask your adjuster directly: “Can you confirm whether my policy covers the detach and reset of solar panels during roof repair?” Having this clarification early helps prevent delays or out-of-pocket surprises later.
What’s Involved in a Detach & Reset?
A solar detach and reset (often written as D&R in insurance estimates) means carefully removing the solar array, storing it during roof work, and reinstalling it once the new roof is complete. This ensures the roofing contractor has full access to the surface beneath and that your solar system is safely reconnected afterward.
The process usually includes:
- Electrical disconnection and labeling by a licensed solar technician
- Panel removal and safe storage (on-site or off-site)
- Roof replacement or repair work
- Reinstallation and system testing to confirm performance
The solar detach and reset cost can vary based on system size, roof pitch, and labor rates—but typically ranges from $1,000 to $5,000 for residential systems and much higher for large commercial arrays. It’s important to ensure your claim includes these costs up front rather than discovering them mid-project.
Avoiding Unexpected Solar-Related Expenses
Solar systems can complicate the insurance process if not handled correctly. Here’s how to avoid surprises:
- Confirm coverage early – Ask your insurer to confirm written approval for detach and reset work.
- Use qualified professionals – Only certified solar or electrical contractors should handle the D&R.
- Coordinate timing – The roofing and solar teams should communicate directly to prevent scheduling conflicts.
- Keep all documentation – Save receipts, testing reports, and correspondence for your insurance file.
- Ask about warranties – Some solar manufacturers require D&R to be performed by authorized technicians to maintain your warranty.
If your contractor or insurer doesn’t include these items automatically, request they be added as a supplemental claim. At RayPro, our team routinely coordinates with solar specialists to streamline the process and ensure full compliance.
Key Takeaway: If your roof has solar panels, don’t treat them as an afterthought in your insurance claim. The detach and reset process is a critical step that ensures both your roof and solar system are restored safely and correctly.
Roof Insurance Claim Tips to Maximize Your Coverage
Even a small oversight in the roof insurance claim process can lead to a lower payout—or a denied claim altogether. That’s why preparation, documentation, and the right contractor make all the difference. Below are five essential tips to help you avoid delays, reduce stress, and get the most from your insurance policy.
Tip 1: Get an Independent, Detailed Inspection
Do:
- Hire a licensed roofing contractor to perform a thorough inspection before the adjuster visit.
- Ensure the report includes photos, damage descriptions, measurements, and repair estimates.
Don’t:
- Rely solely on the adjuster’s evaluation—especially if they missed areas of hidden or structural damage.
Why it matters: An independent roof inspection report adds credibility to your claim and helps correct under-assessments. At RayPro, we provide detailed reports designed for insurance use—helping you start the process with a strong foundation.
Tip 2: Keep a Paper Trail of All Communications
Do:
- Save emails, text messages, and written notes from phone calls with your insurer or adjuster.
- Log dates of inspections, claim submissions, and follow-up requests.
Don’t:
- Assume verbal approvals or agreements are enough—get everything in writing.
Why it matters: A well-organized file can speed up resolution and protect your position if disputes arise. This is especially important during the claim negotiation process.
Tip 3: Understand ACV vs. RCV Terms
Do:
- Ask your insurer if your policy pays Actual Cash Value (ACV) or Replacement Cost Value (RCV).
- Understand that ACV subtracts depreciation, while RCV covers the full replacement—often after work is completed.
Don’t:
- Be caught off guard by the roof depreciation schedule used by insurers to reduce your payout.
Why it matters: Understanding how your policy calculates value helps you budget appropriately and avoid surprises in the settlement offer.
Tip 4: Don’t Wait—Temporary Repairs Matter
Do:
- Use tarps or temporary materials to protect your property from further damage.
- Keep receipts and photos of these emergency measures.
Don’t:
- Delay action thinking the insurer will penalize you for fixing things too soon. Preventing more damage is actually expected.
Why it matters: Insurers often require proof that you took steps to mitigate further damage. Temporary repairs show responsibility—and they’re usually reimbursable under the claim.
Tip 5: Choose a Licensed, Insured Roofing Contractor
Do:
- Work with a contractor who is licensed, certified, and has experience with insurance claims.
- Ask for references, proof of insurance, and a clear scope of work.
Don’t:
- Hire a “storm chaser” or out-of-state roofer who disappears after the job.
Why it matters: Choosing the right contractor is just as important as dealing with the insurance company. RayPro is licensed, insured, and has over 17 years of experience serving both residential and commercial clients across 17 states. We know how to navigate insurance work—and how to get your property back to pre-loss condition with minimal hassle.
Key Takeaway: Maximizing your roof insurance coverage isn’t just about what your policy says—it’s about how you prepare, document, and respond throughout the process. These tips can help protect your investment, reduce frustration, and set you up for a smoother claim experience.
Frequently Asked Questions
Start by staying safe and assessing the situation from the ground. If you see signs of damage—like missing shingles, dents, or leaks—take photos right away. Then, contact a licensed roofing contractor for a full inspection. They can help you document everything and provide a repair estimate, which you’ll need when filing your insurance claim. The sooner you act, the better your chances of getting full coverage.
You’ll need clear, time-stamped photos of the damage, a written roof inspection report, a contractor’s repair estimate, and any temporary repair receipts. Also document the date and type of storm event (hail, wind, debris, etc.), and keep a record of all communication with your insurer and adjuster. This insurance claim documentation builds a strong case for full reimbursement.
It depends on your policy and the extent of the damage. If your roof is significantly damaged (often more than 25%), or if code requirements prohibit partial repairs, your insurer may approve a full replacement. However, you’ll need to check whether your policy pays Actual Cash Value (ACV) or Replacement Cost Value (RCV)—this impacts how much you’ll receive, especially for older roofs.
You can request a claim negotiation or submit a supplement with additional documentation. Start by reviewing your insurer’s explanation for the denial or low payout. Then, have your contractor provide a revised estimate or a second inspection. If necessary, you can hire a public adjuster to advocate on your behalf. RayPro’s team often helps clients navigate this process to secure a fair resolution.
Many policies do cover the cost to detach and reset solar panels if roof repairs are related to a covered loss, such as hail or storm damage. However, it’s not always automatically included—ask your insurer to confirm coverage. The cost can range from $1,000 to $5,000+ depending on your system. Be sure your contractor works with licensed solar technicians to protect your warranty and ensure proper reinstallation—especially when navigating roofing insurance claims involving solar systems.