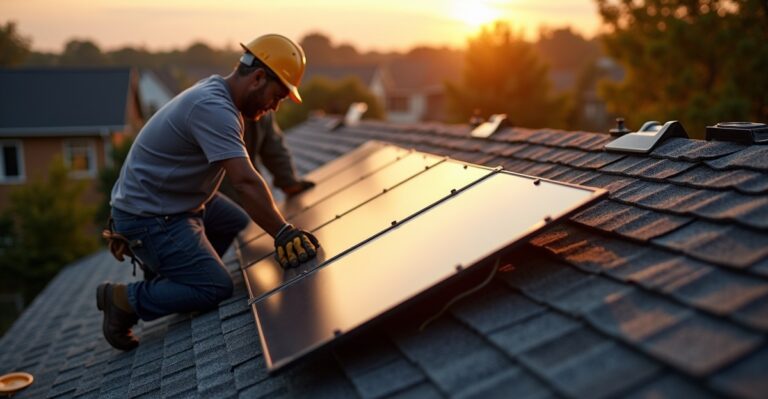
How to Shingle a Roof: Step-by-Step Guide
If you’re wondering how to shingle a roof the right way—whether for your home or a commercial property—you’re in the right place. This guide breaks down each step of the roof shingling process, from prep work and materials to proper installation techniques that ensure durability and compliance with building codes.
Whether you’re tackling a DIY project or deciding if it’s time to call in a professional, you’ll gain a clear understanding of what’s involved, what to watch out for, and how to get the best results.
What you’ll learn:
- Why Roof Shingling Matters
- Know Before You Begin — Safety, Permits, and Materials
- Step-by-Step Guide to Shingling a Roof
- DIY vs. Professional Installation — What to Consider
- Tips for Commercial Property Owners
- Cost and Time Estimates for Shingling a Roof
- Maintenance Tips After Roof Installation
- When to Call the Experts
- Frequently Asked Questions
Let’s get started.

Why Roof Shingling Matters
A well-shingled roof does more than protect your home or building—it plays a crucial role in energy efficiency, weather resistance, and long-term property value.
Whether you’re dealing with the aftermath of a Florida storm, addressing natural wear and tear, or planning a renovation, knowing how to shingle a roof correctly can prevent costly damage and extend your roof’s lifespan by years.
Improper installation is one of the most common causes of premature roof failure. Shingles that aren’t aligned, nailed, or overlapped properly can lead to leaks, trapped moisture, and even structural issues.
For commercial properties, these problems can disrupt operations and increase liability risks. For homeowners, they can mean expensive repairs and decreased curb appeal.
Recognizing the signs that it’s time to re-shingle—like curling edges, missing tabs, or granule loss—is your first line of defense. If your roof is over 15 years old or showing visible wear, it’s worth exploring whether a new shingle installation could be the right move.
Done properly, it’s an investment that not only protects your space but also adds visual appeal and resale value.
Key takeaway: Understanding the importance of quality roof shingling is the foundation for making informed decisions—such as selecting the best roof type for your property, whether you plan to DIY or hire a certified contractor like RayPro Roofing & General Contracting.

Know Before You Begin — Safety, Permits, and Materials
Before diving into the roof shingling process, preparation is everything. Working on a roof is physically demanding, potentially dangerous, and subject to strict building codes—especially in states like Florida where weather and hurricane compliance are major factors.
Whether you’re a confident DIYer or just gathering knowledge to evaluate your contractor’s process, this section covers the critical groundwork to help you get started the right way.
Safety First: Working at Heights and Weather Readiness
Roofing work puts you at risk of serious injury if the proper precautions aren’t in place. Fall protection is essential—even on single-story homes. Use personal fall arrest systems (PFAS), secure ladders on level ground, and wear non-slip shoes. Always work with a partner when possible, especially if you’re navigating pitches or carrying materials.
For guidelines on safe roofing practices, refer to the OSHA Fall Protection in Residential Construction Guide (PDF), which details harnessing systems, ladder safety, and edge awareness techniques.
Weather is another major consideration. Never attempt roof work in wet, windy, or excessively hot conditions.
Shingles install best in mild weather—ideally between 50°F and 80°F. In Florida and other southeastern states, aim for the cooler months to avoid unpredictable rain or extreme heat, which can affect both safety and the performance of adhesive-backed shingles.
Pro Tip: Wind-resistant shingles must be sealed correctly to prevent future uplift. Heat can help with adhesion, but too much sun exposure during installation can soften materials and cause premature wear.
Permits and Local Building Codes
Roofing isn’t just about hammer and nails—it’s also about compliance. In Florida and many other states, local building departments require permits for roof replacements or substantial repairs. For a deeper dive into the legal and structural requirements, check out our guide on Florida roofing permits and code rules.
These codes ensure structural integrity, proper drainage, fire resistance, and, especially in hurricane zones, wind uplift resistance.
Failing to obtain the right permit can result in fines, failed inspections, or insurance complications later on. Learn more in this excellent overview of why roofing permits are important in Florida.
Florida-Specific Note: The Florida Building Code, Chapter 9 – Roof Assemblies outlines specific requirements for materials, slope, edge securement, underlayment, flashing, and uplift resistance in residential and commercial settings.
Always reference the latest FBC edition when planning a project or schedule a roof safety assessment with a qualified expert.
Tools and Materials Checklist
Having the right tools and roofing materials on hand will make the job smoother, safer, and more professional, and it’s also crucial to understand the role of gutters in roofing systems to avoid water‑related issues down the road.
Below is a checklist of essentials for a standard asphalt shingle roofing installation:
Tools:
- Safety harness and lanyard
- Ladder with stabilizer
- Roofing hammer or pneumatic nailer
- Utility knife with extra blades
- Chalk line
- Measuring tape
- Roofing shovel (for tear-off)
- Tin snips (for flashing)
- Pry bar
- Caulk gun
Materials:
- Asphalt shingles (3-tab or architectural)
- Starter strip shingles
- Underlayment (roofing felt or synthetic)
- Ice and water shield (leak barrier)
- Drip edge
- Roofing nails (galvanized, corrosion-resistant)
- Flashing (aluminum or galvanized steel)
- Ridge cap shingles
- Roofing cement or adhesive
- Vent boots (for pipe penetrations)
Key takeaway: Planning ahead with the right safety gear, legal permits, and materials ensures a smoother project and avoids costly mistakes. Whether you’re installing shingles yourself or hiring a pro, proper prep is what sets the stage for lasting results.

Step-by-Step Guide to Shingling a Roof
Now that you’re equipped with the right knowledge and materials, here are the essential steps to shingle a roof from prep to final ridge cap.
While experienced DIYers may be able to complete a basic installation, larger or steep-sloped roofs—and especially those on commercial buildings—are best left to professionals like RayPro, who are licensed, insured, and trained to meet all code and safety requirements.
Step 1: Prep the Roof Deck
Start by removing all existing shingles, underlayment, and nails down to the roof deck. A roofing shovel or tear-off tool works well for this task. Inspect the decking underneath for water damage, rot, or structural weakness. Any compromised sheathing should be replaced with approved plywood or OSB.
If structural damage is present, it may also require roof truss repair to ensure safety and load-bearing capacity.
Once clean and dry, sweep the entire surface to remove dust and debris. A clean base ensures better adhesion and reduces the risk of leaks later.
Tip: Mark roof planes, ridges, valleys, and eaves with chalk lines before moving to the next phase to guide your installation.
Step 2: Install Leak Barrier and Underlayment
Start by rolling out an ice and water shield—a peel and stick roof underlayment—along the bottom edge of the roof (eaves) and in valleys. This membrane protects against water infiltration caused by ice dams or wind-driven rain.
Next, cover the rest of the roof deck with roofing felt or synthetic underlayment—learn more about the different types of underlayment and which is best for your home.
Overlap each row by 2–4 inches, and fasten per manufacturer instructions. In Florida and other humid or hurricane-prone areas, synthetic underlayments offer better durability and moisture resistance.
Reminder: Overlap underlayment at all valleys and continue it at least 6 inches up any vertical walls for extra protection.
Step 3: Install Drip Edge and Starter Strip
Use drip edge flashing to protect against water seepage. Apply starter shingles to help with wind resistance and secure the first row of shingles. This metal edge directs water into the gutter and prevents it from seeping behind the fascia.
Then apply starter strip shingles directly above the drip edge, along both eaves and rakes. These strips provide a secure base for the first course of shingles and help reduce wind uplift.
Step 4: Begin the First Course of Shingles
Snap a horizontal chalk line about 5–6 inches from the bottom edge to guide your first course. Lay your full-sized shingles directly above the starter strip, beginning at the bottom corner of the roof.
Nail each shingle with four to six roofing nails, depending on local wind zone requirements (six nails is standard in high-wind areas like coastal Florida).
Nails should be placed just below the adhesive strip, evenly spaced, and driven flush—not overdriven or at an angle.
Pro Tip: Always follow the manufacturer’s installation guide for shingle placement and fastener locations.
Step 5: Add Successive Courses
Continue up the roof by overlapping each row of shingles with the one below it. Knowing how to stagger shingles on a roof—offsetting vertical joints by 6 inches—is key to preventing water infiltration.
Trim edges where needed and maintain straight lines with the help of chalk guidelines. As you move higher, maintain consistent nail spacing and check alignment frequently.
Common Mistake to Avoid: Don’t let the edges of shingles align vertically from one row to the next—this can create vulnerable points for leaks. This is just one of several shingle installation errors that can compromise your roof—knowing what to avoid is just as important as knowing what to do.
Step 6: Valleys, Vents, and Flashing
Valleys require special attention. You can use a closed-cut valley or woven valley technique depending on your preference and local building code. In either case, install a wide strip of leak barrier under the valley before laying shingles.
Apply flashing around chimneys, skylights, and valleys. For enhanced moisture control and leak prevention, proper roof flashing repair may be needed during re-roofing.
Step flashing should be layered with shingles along sidewalls—see our roof flashing basics to ensure each piece is properly installed and sealed.
Step 7: Install Ridge Cap Shingles
Shingling the peak of a roof involves installing ridge cap shingles that seal the ridge and provide attic ventilation.
These specially designed shingles cover the joint where the two roof planes meet and allow ventilation from the attic space.
Start at one end of the ridge and work toward the prevailing wind direction, overlapping each cap shingle by 5–6 inches. Nail them securely and cover all exposed fasteners with roofing cement for weatherproofing.
Final Tip: Ridge ventilation systems can be integrated beneath ridge caps to improve airflow and reduce heat buildup, especially important in hot, humid climates.
Key takeaway: Proper roof shingle installation requires attention to layering, alignment, sealing, and following code-compliant best practices. If at any point the project feels beyond your skill level—or if you’re managing a commercial property—consulting with a professional roofing contractor like RayPro ensures your investment is protected and up to code.

DIY vs. Professional Installation — What to Consider
Shingling a roof might seem like a straightforward home improvement project, especially for experienced DIYers. But roofing is one of the most physically demanding and technically nuanced tasks in exterior construction—and mistakes can lead to expensive, long-term consequences.
Before climbing the ladder, it’s important to weigh the risks and benefits of doing it yourself versus hiring a licensed professional. For a deeper look at when to DIY and when to hire a contractor, explore our guide on DIY vs. professional roofing and make the right decision for your property and budget.
Risks of DIY Roofing Projects
While DIY roof installation may save on labor costs upfront, the potential downsides are significant—particularly for multi-story homes or commercial properties:
- Safety Hazards: Falls are the leading cause of injury in roofing. Without proper harnessing, ladder stabilization, and experience working at heights, accidents can happen quickly.
- Improper Installation: Misaligned shingles, under-nailed courses, or missed flashing points can compromise the entire roofing system, leading to leaks and premature failure.
- Code Violations: In states like Florida, roofing must comply with strict wind uplift and waterproofing regulations. Non-compliant DIY jobs can result in denied insurance claims or failed inspections.
- No Warranty Coverage: Manufacturer warranties often require installation by certified professionals. DIY work may void these protections, leaving you responsible for any future issues.
Mistakes often lead to issues like leaks or premature shingle failure. For emergency fixes, emergency roof repair services can help prevent worsening damage.
Why Professional Installation Pays Off
Hiring a certified contractor like RayPro ensures proper craftsmanship, permits, timelines, warranties, and insurance coverage—with the added peace of mind that comes from experience, safety practices, and accountability. Here’s what you gain with professional service:
- Expert Craftsmanship: Licensed contractors are trained in advanced installation techniques, ventilation planning, and flashing details that prevent long-term issues.
- Code Compliance: Professionals stay up to date on state and local codes, including the latest editions of the Florida Building Code.
- Warranties and Guarantees: Many roofing companies, like RayPro, offer workmanship warranties in addition to manufacturer-backed product warranties.
- Project Efficiency: From tear-off to cleanup, professionals manage timelines, material ordering, and labor—ensuring your property is protected with minimal disruption.
- Insurance and Liability Protection: A reputable contractor will be fully insured, so you’re not liable for injuries or property damage during the project.
If you’re still unsure about how to choose a provider, check out this guide: How to Choose the Right Roofing Contractor.
RayPro: A Full-Service Roofing Partner You Can Trust
With over 17 years of experience, RayPro has earned the trust of thousands of homeowners and commercial property managers across 17 states. Our team is fully licensed, insured, and trained to handle everything from single-family homes to large-scale multi-unit and industrial projects.
We understand the regional challenges—like hurricane resilience and energy efficiency—and deliver roofing solutions built to last.
We also offer exclusive financing options and industry-leading warranties, making quality roofing more accessible and secure for every customer.
DIY vs. Professional Roofing
| Feature/Factor | DIY Installation | Professional Installation (RayPro) |
| Safety | High risk, no liability coverage | OSHA-compliant, fully insured team |
| Tools & Equipment | Requires full tool investment | All equipment and safety gear provided |
| Code Compliance | Risk of violations | Fully compliant with state/local codes |
| Warranties | Often voided | Manufacturer + workmanship warranties |
| Time Commitment | Several days to weeks | Timely and efficient project delivery |
| Long-Term Value | Depends on skill | Guaranteed quality and durability |
| Ideal For | Small, low-slope single-family roofs | Any size or complexity of property |
Key takeaway: While DIY roof installation may seem cost-effective, professional service offers the safety, reliability, and long-term value that most property owners ultimately need. If you’re ready for a roof that meets code, resists storms, and comes backed by real guarantees, RayPro is ready to help.

Tips for Commercial Property Owners
Shingling a roof on a commercial property comes with a unique set of challenges—ones that go far beyond the typical residential scope.
Whether you’re managing a multi-family apartment complex, retail plaza, office building, or industrial warehouse, your roofing project must balance performance, safety, and long-term ROI while minimizing disruption to operations. Here’s what to consider before moving forward.
1. Understand Local Building Codes and Compliance Requirements
Commercial properties are subject to stricter code regulations than residential homes, especially in states like Florida. This includes mandates around fire ratings, wind uplift resistance, drainage systems, and material selection.
Failing to meet these standards can result in failed inspections, fines, or costly rework—risks that commercial property owners can’t afford.
Tip: Always verify that your contractor is familiar with local commercial codes and has a track record of passing inspections with minimal delays.
2. Account for Liability and Insurance Coverage
Roofing on a commercial structure poses higher liability risks due to building height, traffic flow, and the value of what’s inside. If your contractor isn’t fully licensed and insured, your business could be held responsible for injuries or damages during installation.
Make sure your chosen partner provides proof of general liability insurance and workers’ compensation coverage.
RayPro Advantage: We are fully licensed and insured in every state we operate in, and our crews follow OSHA standards to ensure safety and compliance at every step.
3. Schedule with Occupants and Operations in Mind
Timing is everything in commercial roofing. Whether you’re managing tenants or running a logistics-heavy facility, a poorly timed roofing project can disrupt business, create noise complaints, or cause access issues.
A strategic, phased approach with clear communication is essential to minimize downtime and keep your property fully operational.
Look for contractors who provide:
- Phased scheduling or off-hours work
- Onsite project supervisors
- Clear signage and safety zone setups
- Real-time updates to property managers
4. Prioritize Long-Term Maintenance and Warranties
Commercial roofing systems endure more wear than residential ones—heat load from HVAC units, foot traffic for maintenance access, and exposure to chemicals or pollutants. Preventive maintenance can extend the life of your roof and protect your capital investment.
Choose materials designed for commercial use and ask about post-installation maintenance plans.
Pro Tip: Roof warranties for commercial properties often require routine inspections and documented service to stay valid.
5. Partner with a Full-Service Provider
When managing a portfolio of buildings or a large-scale project, working with multiple contractors adds complexity and risk. A full-service provider like RayPro simplifies the process by managing everything from permitting and tear-off to final inspection and ongoing service.
Our commercial roofing solutions include:
- Flat and sloped roof installations
- Storm restoration and insurance coordination
- Energy-efficient upgrades and solar integration
- Detailed estimates with transparent pricing
- Preventive maintenance and repair plans
For flat roof systems, flat roof services provide tailored solutions including waterproofing, storm resistance, and thermal regulation.
Key takeaway: For commercial property owners, roofing is more than a construction task—it’s a strategic asset decision. Partnering with an experienced, full-service contractor like RayPro ensures your project meets every requirement, stays on schedule, and delivers long-term value.

Cost and Time Estimates for Shingling a Roof
One of the most common questions property owners ask before starting a roofing project is: How much will it cost, and how long will it take? The answer depends on several key factors—including the size and pitch of your roof, the type of shingles used, regional labor rates, and whether the project involves a full tear-off or a new installation.
Below, we break down the typical cost and time ranges so you can plan your project with clarity and confidence.
Typical Roofing Costs (Per Square)
In the roofing world, pricing is usually calculated per “square”—a unit that equals 100 square feet of roofing material.
| Cost Breakdown | Estimated Range (per square) |
| Asphalt Shingles (materials only) | $90 – $150 |
| Labor (installation & tear-off) | $150 – $300 |
| Underlayment, Flashing, Nails | $20 – $40 |
| Total Per Square (Installed) | $260 – $490 |
So for a standard 2,000 sq. ft. roof (20 squares), you could expect a full installation to range between $5,200 and $9,800—use our asphalt shingle roofing cost breakdown to better understand the factors influencing price.
Regional Note: Cost varies by size, materials, and location. Florida-specific needs may require enhanced wind ratings and drainage systems. Proper budgeting should include both material and labor costs, plus items like roof insulation for energy savings.
How Long Does Roof Installation Take?
Time is just as valuable as budget—especially for commercial buildings that need to maintain operations. Here’s what to expect:
| Roof Size / Type | Estimated Timeframe |
| Small Residential (1,000–1,500 sq. ft.) | 1–2 days |
| Medium Residential (1,500–2,500 sq. ft.) | 2–3 days |
| Large Residential (2,500+ sq. ft.) | 3–5 days |
| Commercial Flat/Low-Slope Roofs | 5–10+ days (varies by scope) |
These timelines assume favorable weather conditions and a professional crew. DIY projects often take significantly longer, especially without experience or access to proper tools and labor support.
Want a full breakdown? Read our Roof Replacement Timeline Guide for more details on how long each phase typically takes.
Financing Your Roofing Project
We understand that roofing is a significant investment—whether you’re upgrading curb appeal, replacing storm-damaged shingles, or preparing a commercial property for resale or lease. RayPro offers financing of up to $200,000 with flexible terms—ideal for storm-damaged properties needing storm damage repair or full replacements.
Our financing options feature:
- Quick approvals
- Flexible payment plans
- No hidden fees or prepayment penalties

Key takeaway: Roof shingling costs and timelines vary widely, but having a clear estimate upfront helps you make informed decisions. By working with a trusted contractor like RayPro, you’ll get transparent pricing, efficient project scheduling, and financing options that make your investment more manageable.

Maintenance Tips After Roof Installation
Once your new roof is installed, the work doesn’t stop there. Regular maintenance is key to extending the life of your shingles, preventing costly damage, and ensuring your investment continues to perform year after year.
Whether you’re a homeowner or managing a commercial property, these post-installation tips will help you protect your roof and avoid premature repairs or replacements. For a more detailed seasonal roof maintenance checklist, including safety tips and weather-specific guidance, check out our comprehensive blog post.
1. Clean Gutters Regularly
Clogged gutters are one of the leading causes of roof water damage. Leaves, branches, and debris can block water flow, causing it to back up under the shingles and into your home or building. Clean your gutters at least twice a year—ideally in spring and fall—and check after major storms to ensure downspouts are clear.
Tip: Install gutter guards to reduce buildup and cut down on seasonal cleaning efforts.
2. Inspect Shingles Seasonally
Twice a year, do a visual inspection of your roof—once in the spring and once in the fall—using a roof inspection checklist to ensure nothing is overlooked. Look for missing, cracked, curled, or discolored shingles, especially along the roof edges and around flashing. Early detection of wear or damage allows for quick repairs before they lead to leaks or structural issues.
If you’re not comfortable getting up on a roof, consider hiring a professional for a seasonal checkup.
3. Ensure Proper Attic Ventilation
Ventilation isn’t just about air quality—it directly impacts the health of your roof. Poor ventilation can trap heat and moisture in the attic, leading to shingle deterioration, mold growth, and higher cooling costs. Make sure ridge vents, soffit vents, and attic fans (if applicable) are working properly.
In warm climates like Florida, proper ventilation is especially important to manage heat buildup and prolong the life of asphalt shingles.
4. Trim Trees and Overhanging Branches
Branches that touch or hang over your roof can scrape shingle granules, clog gutters, and serve as a bridge for pests. Trim back limbs that are within six feet of the roof, and remove any dead trees or large limbs that could fall during a storm.
5. Schedule Professional Roof Inspections
Even the most diligent property owners can miss subtle issues. That’s why scheduling an annual or bi-annual roof inspection with a qualified contractor is highly recommended—especially for commercial buildings with larger roof systems or multiple penetrations.
At RayPro, we offer scheduled maintenance plans that include detailed inspections, minor repairs, and preventive care to help you avoid costly surprises. These plans also help preserve your manufacturer’s warranty, which often requires proof of regular upkeep.
Key takeaway: Routine maintenance is essential to maximize the life and performance of your roof. By staying ahead of small issues and scheduling professional inspections, you’ll protect your investment, maintain energy efficiency, and ensure peace of mind—season after season.

When to Call the Experts
Even the most detailed DIY roofing job can run into unexpected issues—and some signs shouldn’t be ignored. Whether your roof is newly installed or has been in place for a few years, knowing when to bring in a professional can save you from larger problems down the line.
Signs You Shouldn’t Overlook
- Recurring Leaks or Water Stains: If you’ve patched the same area more than once, there may be an underlying issue such as improper underlayment, flashing failure, or poor ventilation.
- Missing or Lifting Shingles: Shingles that blow off easily or curl at the edges may indicate improper nailing, adhesive failure, or poor-quality materials.
- Uneven or Sagging Rooflines: These are structural red flags that require immediate inspection to prevent collapse or extensive water damage.
- Shingle Granules in Gutters: Excessive granule loss can signal accelerated wear—especially with older or poorly installed asphalt shingles.
- Mold, Mildew, or Rot in the Attic: These are often symptoms of insufficient ventilation or hidden leaks and can lead to indoor air quality issues and structural decay.
Why Professional Help Matters
If you’re seeing any of the signs above—or simply want peace of mind after a storm or major weather event—it’s time to consult a licensed roofing professional. At RayPro, we bring over 17 years of experience to every inspection and repair. Our certified teams follow strict industry standards and local building codes to ensure your roof is safe, functional, and built to last.
We also back our work with industry-leading warranties and offer financing options to make repairs or replacements more manageable—without cutting corners on quality.
Schedule a Free Consultation with RayPro
Not sure where to begin? Contact us today for a no-obligation inspection and estimate tailored to your needs.
Don’t wait until small issues turn into costly repairs. RayPro offers free consultations and inspections for residential and commercial properties across 17 states. Our team will assess your roof, provide honest recommendations, and deliver a detailed estimate with no obligation.
Contact RayPro today to schedule your free roof evaluation and get expert guidance tailored to your property’s needs.
Frequently Asked Questions
The time it takes to shingle a roof depends on several factors, including the roof’s size, pitch, and condition, as well as the weather and crew size. On average:
Small residential roofs can take 1–2 days
Mid-sized homes may take 2–3 days
Large or complex roofs could take 3–5 days
Commercial projects typically require 5–10+ days due to added scope and compliance requirements
Hiring a professional like RayPro ensures efficient project timelines and minimal disruption to your property.
In some cases, yes—but it depends on local building codes, roof condition, and the number of existing layers. Most codes allow for one additional layer of shingles, but this isn’t always advisable. Installing over old shingles can:
Conceal existing damage or soft spots
Reduce the lifespan of the new roof
Increase the risk of improper alignment or ventilation issues
RayPro always recommends a full tear-off for maximum durability and code compliance, especially in high-wind areas like Florida.
Architectural (laminate) asphalt shingles typically offer the best combination of durability, aesthetics, and value. These shingles:
Last 25–30 years on average
Are more resistant to wind and hail than 3-tab shingles
Offer improved curb appeal due to their dimensional appearance
For even longer-lasting options, impact-resistant shingles and synthetic or metal roofing systems can provide 40+ years of performance with proper maintenance.
Most shingle manufacturers recommend four nails per shingle under standard conditions. However, in high-wind regions (like coastal Florida), six nails per shingle is the industry standard to meet code and wind uplift requirements.
Always follow the shingle manufacturer’s specific guidelines to maintain warranty coverage and ensure optimal holding strength.
DIY may be suitable for small, low-slope roofs if you have experience and safety equipment. However, for most homeowners and virtually all commercial property owners, hiring a licensed roofing contractor is the smarter, safer, and more cost-effective option.
Professionals like RayPro deliver:
Code-compliant installation
Certified crews and safety protocols
Long-term warranties and financing options
Peace of mind that the job is done right the first time