The Best Season for Roof Replacement: What You Need to Know
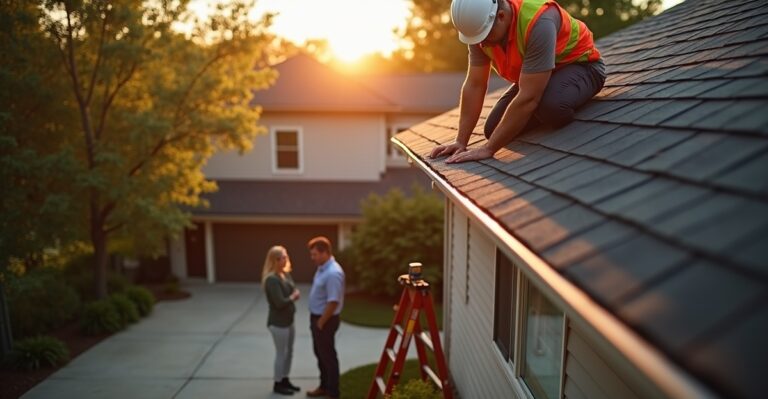
If you’re wondering what’s the best season for roof replacement?, you’re not alone—and the answer isn’t the same for everyone. Timing your roofing project right can mean lower costs, fewer delays, and better long-term performance, whether you’re protecting a single-family home or managing a multi-building commercial property.
In this guide, we’ll break down the pros and cons of each season so you can plan with confidence—based on your region, budget, and property needs. You’ll also get practical tips on booking timelines, weather considerations, and how to avoid common project pitfalls.
Here’s what we’ll cover:
- Why Timing Matters for Roof Replacement
- Spring Roof Replacement: A Fresh Start
- Summer Roof Replacement: High Demand, High Heat
- Fall Roof Replacement: Ideal Conditions for Most Projects
- Winter Roof Replacement: Is It a Bad Idea?
- Regional and Project-Type Considerations
- Tips for Booking the Right Time
- Conclusion: Make the Most of Every Season
Let’s start by looking at why your timing matters more than you might think.
Why Timing Matters for Roof Replacement
When it comes to replacing your roof, timing isn’t just a detail—it’s a major factor that affects your project’s success. Whether you’re a homeowner planning ahead or a property manager juggling multiple facilities, choosing the right season can impact everything from material performance to crew availability and cost. Understanding the timing gives you more control, fewer headaches, and better long-term results.
How Seasons Affect Roofing Projects
Roofing isn’t a one-size-fits-all job—and the time of year you choose makes a difference. Here’s how:
Weather conditions shape your roof installation timeline. Cold temperatures can make shingles brittle and harder to install, while high heat and rain can affect how materials seal or cure and cause scheduling delays. See detailed examples of how weather influences roof‑replacement timing. In short, poor weather means more downtime, potential material issues, and rescheduling headaches.
Contractor availability changes with the seasons. Spring and fall are typically the busiest times for roofing contractors. If you wait too long, you may face scheduling backlogs, especially in high-demand areas or during post-storm recovery periods. On the flip side, summer and winter can offer more flexible scheduling if your property and location allow for it.
Labor and material costs can fluctuate. Just like airline tickets, peak-season demand can drive up costs. If you’re aiming for the most affordable roof replacement timing, you may want to consider shoulder seasons or book early before the rush begins.
What to Consider When Choosing a Timeline
Not every roofing project is planned in advance—but when it is, a little foresight into your roof replacement timeline can go a long way. Here’s what to think about before locking in your project date:
Is this a planned upgrade or an urgent repair? Emergency replacements (like after a hailstorm or leak) may need to happen right away, regardless of season. In that case, we’ll work around the conditions to secure your property and get it done safely.
Do you need to coordinate with an insurance claim? Timing your roof replacement to align with your insurance process can help streamline documentation, adjuster approvals, and coverage windows—especially after storm-related damage.
Are you preparing for a home sale, energy-efficiency upgrade, or other renovation? Replacing your roof ahead of selling your home or installing solar panels can maximize value and prevent future disruptions. Fall and spring are popular seasons for these strategic upgrades—but each project has its own ideal window based on your goals and location.
Key takeaway: Timing your roof replacement strategically helps you avoid delays, manage costs, and get the best performance out of your new roof. The “best season” will depend on your property type, location, and priorities—but understanding the impact of timing puts you in the driver’s seat.
Spring Roof Replacement: A Fresh Start
Spring is often seen as the ideal time to start fresh—and for many property owners, it’s one of the best times of year to replace a roof. After months of cold weather, your roof may have taken a hit from snow, ice, or strong winter winds. Spring gives you the chance to assess any damage, plan ahead, and get work done before the heat of summer kicks in.
Advantages of Spring
Perfect weather for roofing crews and materials. Spring’s moderate temperatures create optimal conditions for roofing work and highlight the benefits of replacing roof in spring, as shingles seal properly and crews can work comfortably. Shingles seal properly, crews can work comfortably, and delays are less frequent.
Great time for post-winter inspections. Many roofing issues show up in the early months of the year. Spring is a natural time to schedule a roof inspection and catch minor problems before they turn into major repairs.
Beat the summer rush. Spring gives you a head start before contractor schedules fill up. You’ll have more flexibility to choose your timeline, and potentially lower costs if you book early in the season.
Prepares your property for energy-efficient upgrades. If you’re considering energy-saving improvements—like adding solar panels or upgrading insulation—spring is an ideal time to make sure your roof is in top shape beforehand. A new or reinforced roof helps protect your investment and boosts long-term performance.
What to Watch Out For
Unpredictable spring weather. While spring is generally mild, some regions experience sudden storms or heavy rain that can delay your project. In areas prone to flooding or hail, make sure your contractor has a weather plan in place.
Permitting slowdowns. Spring is a busy season for construction across the board. Local permitting offices may have longer processing times, which can push back start dates if paperwork isn’t submitted early.
Storm season and insurance claims. In states where spring storms are common, roof damage may qualify for insurance coverage. If you’re filing a claim, talk with your contractor about timing your replacement around adjuster visits and approvals to avoid delays.
Key takeaway: Spring offers an excellent balance of favorable weather, early scheduling access, and strategic value—especially for energy-efficient upgrades or post-winter assessments. Just be sure to plan ahead and account for regional weather and permitting timelines to keep your project on track.
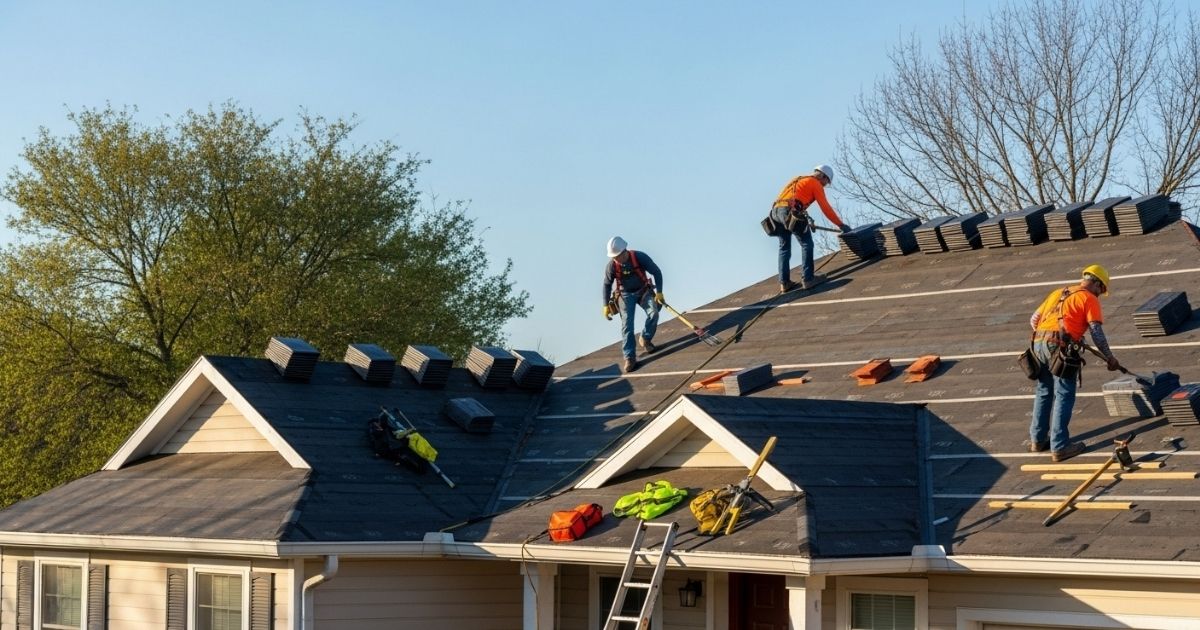
Summer Roof Replacement: High Demand, High Heat
Summer is one of the busiest seasons for roofing—and with good reason. Long days and mostly dry weather create favorable working conditions, making it a popular choice for both homeowners and commercial property managers. But along with those benefits comes increased demand, higher temperatures, and the need for smart scheduling.
Why Summer Works
Extended daylight speeds up production. With more hours of sunlight, roofing crews can start early, work longer, and often finish projects faster—especially on larger or multi-day jobs.
Dry conditions reduce delays. Summer typically brings less rain in many regions, which helps prevent weather-related stoppages and water damage during the tear-off and installation phases.
Ideal for pre-fall weatherproofing. Replacing a roof in summer gives you peace of mind heading into the stormier fall season. It’s also a great time to prepare your building for energy efficiency upgrades or solar installation.
Challenges of Summer Projects
Extreme heat affects materials and crews. High temperatures—especially on dark roofing surfaces—can soften asphalt shingles, making them harder to handle and more prone to scuffing. Prolonged heat exposure can also take a toll on crew safety and efficiency, requiring more frequent breaks and potentially extending the timeline.
High demand means higher prices. Summer is the peak season for roofing contractors. If you’re scheduling late, you may face longer lead times, fewer available dates, and elevated pricing due to supply and demand.
Risk of UV damage to exposed roofing. Delays caused by material shortages or last-minute weather shifts could expose your roof decking to intense sunlight, which may degrade some underlayment types if not properly covered or scheduled efficiently.
Commercial Considerations
Best time for low-occupancy scheduling. For those wondering the best time of year to replace a commercial roof in Salt Lake, summer often offers the least disruption—especially for schools, hotels, or offices with lighter traffic. Many organizations take advantage of the summer lull to tackle larger projects without interfering with day-to-day operations.
Requires proactive coordination for multi-unit sites. If you’re managing multi-family housing or institutional properties, summer roofing projects demand clear scheduling, communication, and safety planning. Compliance with local roofing safety regulations during peak weather is critical—not just for crew welfare, but also for tenant or occupant safety.
Plan around material delivery and logistics. In high heat, materials like shingles and membranes must be stored properly and installed within specific temperature ranges to avoid product degradation or installation issues.
Key takeaway: Summer offers excellent weather and extended workdays but requires smart planning—especially for large-scale or commercial projects. Early booking, heat-conscious scheduling, and proper safety protocols are essential to getting the most out of a summer roof replacement.
Fall Roof Replacement: Ideal Conditions for Most Projects
If there’s a “sweet spot” for roof replacement, fall is it. With cooler temperatures, steady weather, and fewer storms than spring or summer, fall offers some of the best conditions to replace a roof—especially for property owners looking to boost energy efficiency before winter or lock in long-term value.
Seasonal Strengths
Mild, stable weather makes installation smoother. Fall’s moderate temperatures are ideal for roofing materials like asphalt shingles and sealants, which require specific conditions to bond properly. Crews also work more comfortably and efficiently, which can speed up your project without sacrificing quality.
Prepares your property for colder months. Replacing a roof in the fall ensures your home or building is sealed tight before winter brings snow, ice, or freezing rain. It’s also a smart time to complete energy-efficient roofing upgrades like improved ventilation, insulation, or solar prep—giving you savings when you need them most.
Great for maximizing long-term ROI. Scheduling a roof replacement in the fall means your building is protected before severe weather hits—and experts note that timing like this can reduce future repair costs and extend lifespan, improving your long-term roofing ROI.
Booking Early Is Key
Fall demand fills up fast. Because the season is so well-suited for roofing, many contractors book up quickly—especially in states with a short fall window or active storm seasons. The earlier you schedule, the better chance you have to secure your preferred timeline and pricing.
Storm seasons shift timelines. In hurricane-prone regions, early fall can still bring unpredictable weather that delays or reprioritizes roofing projects. Contractors may prioritize emergency storm repairs, which can affect availability for planned replacements. Planning ahead helps keep your project on track.
Cost efficiency comes with planning. While fall is highly desirable, it can also bring seasonal roofing cost increases due to demand. Locking in a quote early can help you avoid last-minute premiums and give you more flexibility in scheduling.
Key takeaway: Fall offers the ideal mix of weather, performance, and project efficiency—making it the best season to replace roof for many property owners. But demand is high, so booking early is essential to get the best outcome at the best value.
Winter Roof Replacement: Is It a Bad Idea?
Many property owners assume winter is off-limits for roof replacement—but that’s not always true. While winter does come with some challenges, there are situations (and regions) where it can be a perfectly reasonable time to reroof. The key is knowing when it makes sense and what limitations to plan for.
When Winter Can Work
Emergency repairs don’t wait for spring. If your roof suffers damage from a storm, ice buildup, or leaks, waiting until warmer weather isn’t an option. In those cases, winter replacements are not only possible—they’re necessary. Roofing contractors like RayPro are equipped to handle urgent repairs safely, even in colder months.
Flat roofs and certain materials are winter-friendly. Commercial buildings with flat roofing systems, such as modified bitumen or TPO, can often be installed in cooler conditions with the right equipment and techniques. These projects tend to be less affected by cold than pitched residential roofs.
Warmer climates offer year-round opportunities. In many southern states, winter temperatures remain mild enough for roofing work to continue without significant delays or risks. If you’re located in areas like Florida, Texas, or parts of the Southwest, winter can be a great time to schedule work while demand is lower.
Flexible scheduling and possible cost savings. Winter is considered off-season for many contractors, which means you may have an easier time securing a time slot that fits your schedule. You might also find more competitive pricing due to reduced demand.
Winter Roofing Limitations
Cold-sensitive materials and adhesives. Asphalt shingles and certain sealants require warmer temperatures to bond correctly. Installing them in freezing conditions can compromise performance or void warranties, depending on the product. Specialized cold-weather materials may be needed—and not all are ideal for every property.
Safety and daylight concerns. Shorter days and icy conditions increase risks for roofing crews. To ensure safety, crews may work shorter hours or need more prep time, which can extend the project timeline. Adherence to roofing safety regulations during peak weather becomes even more critical in winter.
Weather unpredictability and availability. Snow, ice, or unexpected cold snaps can cause delays. Additionally, if storms cause widespread damage, contractors may prioritize storm-related roof damage claims—so availability for planned replacements may be limited.
Key takeaway: Winter roof replacement isn’t a bad idea—it just depends on your location, urgency, and project type. If you’re dealing with storm damage or located in a milder climate, winter can offer flexibility and cost benefits. Just be sure to work with an experienced contractor who understands cold-weather best practices and can guide you through the safest, most effective options.
Regional and Project-Type Considerations
Not all roofing projects—or climates—are created equal. With RayPro serving clients across 17 diverse states, it’s important to tailor roof replacement planning to your local weather patterns and the unique demands of your property type. Whether you’re managing a multi-building commercial portfolio or upgrading your family home, your approach to timing should reflect your region, goals, and logistical needs.
Know Your Climate Zone
Roofing conditions can vary dramatically between the Southeast, Southwest, Midwest, and beyond. Here’s how your location might influence the best time to replace your roof:
- Southeast (e.g., Florida, South Carolina): Warm climates allow for year-round roofing, but spring and fall often offer the best balance between temperature and humidity. Be cautious of hurricane season when scheduling.
- Southwest (e.g., Arizona, New Mexico): Dry summers are ideal for roofing, but extreme heat can impact material handling and crew safety. Late spring or early fall may be optimal.
- Midwest and Mountain States (e.g., Missouri, Utah): Winters can be harsh, limiting roofing activity. Spring and early fall are typically safest, but summer can work if planned around heat waves.
- Coastal States (e.g., Oregon, Virginia): Rainy seasons can delay projects, so identifying the driest windows in late spring or early fall is essential.
Tip: No matter your region, it’s important to review the roof replacement schedule by climate to avoid costly delays or material issues.
Residential vs. Commercial Planning
Timing a roof replacement also depends on how the property is used and who it serves.
For Residential Projects:
Homeowners tend to prioritize comfort, energy efficiency, and aesthetics. Spring and fall are often favored for their mild weather and smooth scheduling. Coordinating around school breaks, vacations, or home improvement projects can also factor into the timeline. Residential roofing options also vary depending on style and material preference.
For Commercial Projects:
Facility managers and developers focus on compliance, ROI, and vendor coordination. Summer may be ideal when occupancy is low (schools, offices, hotels), while spring and fall offer ideal conditions for large-scale replacements. Phased work or night/weekend schedules can also help minimize operational disruption.
Special Project Factors
Some roofing projects come with added complexity. Here’s how to plan accordingly:
Solar panel detach and reset:
If your property has solar panels, they’ll likely need to be removed and reinstalled during the reroofing process—making it important to consider solar panels and roof longevity when planning your timeline. This requires coordination with a qualified solar technician and may add time to your project. Planning this during milder weather can help avoid delays.
Insurance claim timing:
When dealing with insurance coverage for seasonal roof damage (like hail or hurricane-related issues), aligning your replacement with your claim window is key. Work closely with your contractor and adjuster to ensure documentation, inspections, and approvals are handled efficiently.
Disruption management:
For multi-family housing, schools, or hospitals, tenant and occupant safety is a top concern. Schedule work during low-traffic periods—like summer breaks for schools or off-peak times for facilities—to reduce noise, access issues, and safety risks.
Key takeaway: Your climate and property type should play a central role in deciding the best time to replace your roof. By considering location-specific weather, occupant needs, and project logistics, you can avoid common delays and make sure the job is done right—with minimal disruption and maximum return.
Tips for Booking the Right Time
No matter the season, timing your roof replacement well can make a big difference in both cost and convenience. Whether you’re planning a home improvement or managing a commercial portfolio, staying ahead of the calendar helps you avoid rushed decisions, scheduling conflicts, and unexpected expenses. Here’s how to stay proactive and make the most of your roofing timeline.
How Far in Advance to Book
- Spring and Fall: These are peak roofing seasons, which means crews book out weeks—or even months—in advance. If you’re aiming for a spring or fall project, it’s smart to start planning in late winter or midsummer, respectively. Early booking locks in your preferred dates and gives you time to prepare permits or coordinate with other trades.
- Summer: While contractor availability may loosen slightly, the heat can limit working hours and push timelines longer. Booking at least 4–6 weeks out is still recommended to avoid bottlenecks during this high-demand period.
- Winter: In milder climates, winter can be a flexible time to schedule. However, materials and crew availability may still be limited due to weather. Planning a few weeks ahead allows time to evaluate conditions and prepare for any unexpected delays.
Avoid last-minute scheduling. Waiting until the last minute can mean higher costs due to overtime labor, material rush fees, or having to settle for less ideal installation windows. If you’re looking for affordable roof replacement timing, planning ahead is your best ally.
Start with a Professional Inspection
The best time to plan your roof replacement? Before it becomes urgent. A thorough inspection will tell you whether you have time to schedule during your ideal season—or if you need to act sooner to prevent more costly damage.
Here’s what to expect during a roof inspection before replacement with RayPro:
- A detailed assessment of your roof’s current condition
- Identification of damage, aging, or weak spots
- Honest guidance on urgency and optimal timing
- A clear, written estimate—no hidden fees, no surprises
Even if your roof appears fine from the ground, there could be issues brewing beneath the surface. Catching them early lets you take control of the schedule instead of reacting to a last-minute emergency.
Let’s plan your project the right way—schedule a roof inspection today. It’s the first step to getting a roof that protects your property and your peace of mind.
Conclusion: Make the Most of Every Season
When it comes to roof replacement, there’s no single “best” season that fits every property or project. The right time depends on your region, your goals, and your timeline. Spring offers a fresh start with mild weather. Summer provides long days for big projects—if you plan around the heat. Fall is the most balanced season, ideal for prepping before winter. And even winter can be a smart choice in the right climate or under urgent circumstances.
For homeowners, comfort, efficiency, and peace of mind often drive the decision. For commercial property managers, timing revolves around occupancy, compliance, and minimizing disruption. Each situation is unique—and that’s where thoughtful planning pays off.
At RayPro, we’ve spent over 17 years helping clients across 17 states find the right time to roof with confidence. From seasonal guidance to storm damage response and solar panel coordination, we handle every detail with professionalism, transparency, and care.
Need advice? We’ll help you plan the right time to reroof—get a free inspection or quote today.
Frequently Asked Questions
The best time depends on your climate, property type, and project goals. Fall is often considered ideal due to moderate weather and reliable scheduling. Spring is great for post-winter repairs, while summer works well if planned around the heat. In warmer states, even winter can be a practical option.
Yes—especially in southern or milder regions. While cold weather can affect materials and crew availability, experienced contractors like RayPro can still complete safe, effective roof replacements in winter when conditions allow. Emergency repairs also take priority year-round.
Weather impacts everything from material performance to crew safety. Extreme heat can cause shingle softening, cold can make materials brittle, and storms can delay installation. Choosing the right season helps avoid weather-related setbacks and ensures your roof performs as it should.
It can be. Off-season periods like winter or early summer may offer more contractor availability and competitive pricing. Booking early, no matter the season, is one of the best ways to secure affordable roof replacement timing and avoid rush fees.
Commercial projects often benefit from summer or early fall scheduling—especially for schools, offices, or multi-unit facilities with lighter occupancy during those times. Timing also depends on regulatory compliance, project scale, and the need to coordinate across multiple sites.