How to Choose the Right Roof Underlayment for Your Roofing Material

When it comes to protecting your home or commercial building, what lies beneath your shingles or panels matters just as much as what you see on top. If you’re trying to figure out how to choose roof underlayment that fits your roofing material, climate, and long-term needs, you’re in the right place.
This practical guide walks you through the key factors that affect underlayment selection—from roof pitch and local weather to material compatibility and warranty requirements. Whether you’re managing a property in a hurricane zone or replacing a worn-out roof on your home, this article offers real-world insight to help you make a confident, informed decision.
Here’s what we’ll cover:
- Why Your Roof Underlayment Choice Matters
- Key Factors to Consider Before Choosing Underlayment
- Best Underlayment for Asphalt Shingle Roofs
- Underlayment Options for Metal Roofs
- What to Use Under Tile or Slate Roofs
- Choosing the Right Underlayment for Low-Slope Roofs
- Matching Underlayment to Your Climate Zone
- Building Codes, Warranty Issues & Compliance Traps
- Conclusion: Make the Right Choice for Long-Term Protection
Let’s start by understanding why your roof underlayment choice really matters.

Why Your Roof Underlayment Choice Matters
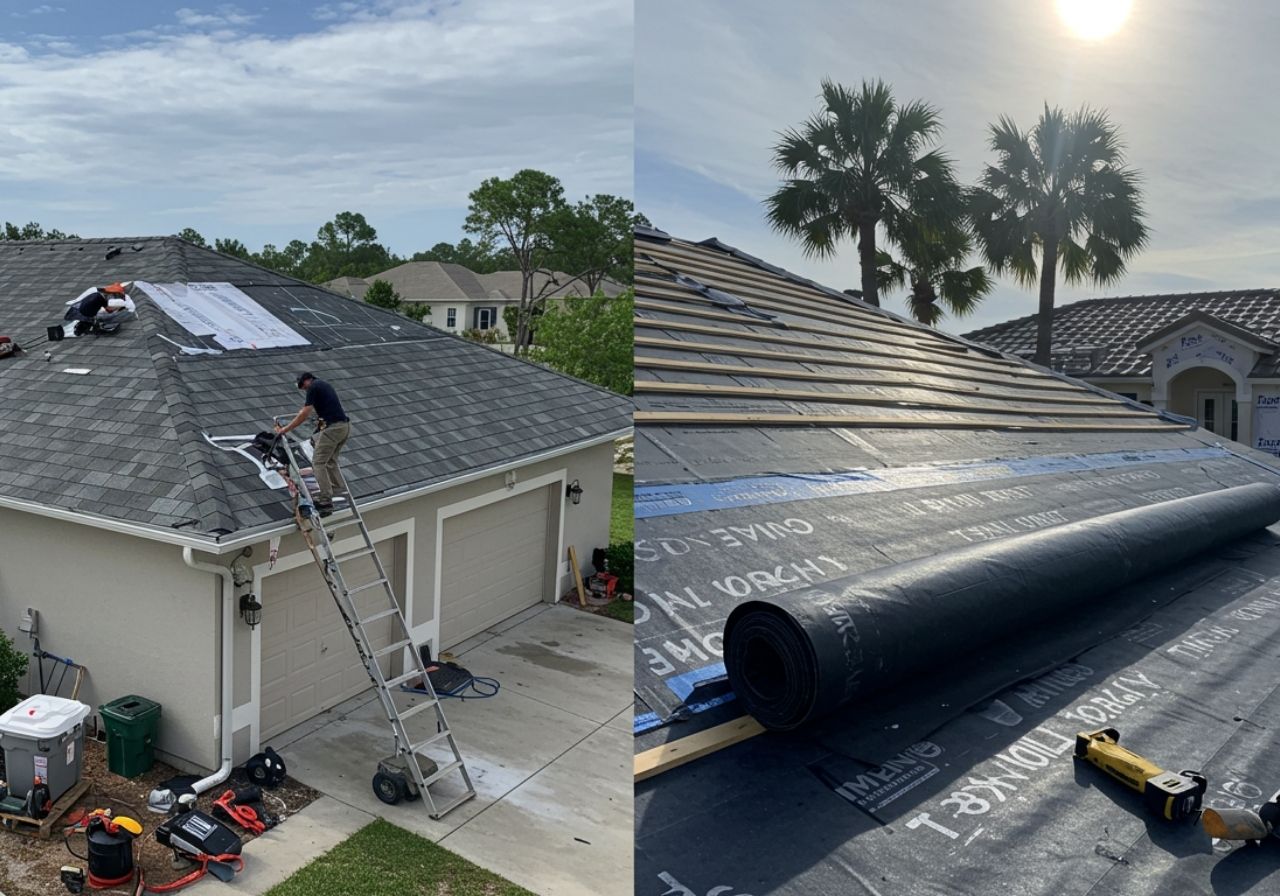
Roof underlayment may be hidden beneath your shingles or panels, but it plays a frontline role in the overall performance and durability of your roofing system. It’s the critical layer between your roof deck and the final roof covering—acting as a secondary barrier against water intrusion, temperature extremes, and structural wear over time. And the truth is, not all underlayments are created equal.
Choosing the wrong type of underlayment for your specific roofing material, climate, or slope can lead to early roof failure, trapped moisture, mold growth, or even warranty voids. That’s why this decision isn’t just about product features—it’s about how well the material fits your project’s real-world needs.
The Role of Underlayment in Roof Performance
Here’s what the right underlayment can help you achieve:
- Prevent Leaks and Water Damage: Even a perfectly installed shingle roof can let water in if wind-driven rain gets underneath. Underlayment adds backup protection—especially important during storms or if the top layer is damaged.
- Boost Energy Efficiency: Certain synthetic or reflective underlayments can help regulate attic temperatures, which is especially useful in hot climates like Florida or the Sunbelt. According to a study on roof reflectivity and attic temperature, energy-efficient underlayments can help reduce thermal load and cooling costs when properly integrated into the roof system. Consider pairing with Roof Insulation improvements for maximum efficiency.
- Extend Roof Lifespan: By reducing wear from heat, UV exposure, and moisture, quality underlayment can help your entire roofing system last longer. Synthetic underlayments typically offer greater longevity than traditional felt, especially in climates that experience wide temperature swings or heavy rainfall.
- Support Warranty Requirements: Some roofing manufacturers require specific underlayment types to validate their warranties—especially for extended or “lifetime” coverage.
- Meet Local Building Codes: In high-risk areas (like coastal regions or wildfire zones), codes may dictate specific materials or fastening methods. Using a non-compliant underlayment could result in costly do-overs or legal issues.
One Size Doesn’t Fit All
Consider this: a self-adhered underlayment may be ideal for a standing seam metal roof in a snowy region—but it could cause ventilation issues on a wood shake roof in a warm, humid climate. Similarly, a basic felt underlayment might be suitable for a detached garage but not for a multi-family residence with low-slope designs.
If you’re looking for an overview of the most common products available before diving deeper into selection criteria, be sure to check out our Roof Underlayment Types Guide for foundational insights into materials like felt, synthetic, and peel‑and‑stick roof underlayment.
Takeaway: The underlayment you choose isn’t just a technical detail—it’s a strategic decision that protects your structure, supports energy savings, and ensures your roofing investment performs as expected over time.
Key Factors to Consider Before Choosing Underlayment
Not all roofs are built the same—and your underlayment shouldn’t be either. Before selecting a material, it’s important to consider the unique conditions of your project. From roof shape to weather exposure, these variables can affect how well an underlayment performs, how long it lasts, and whether it meets legal or warranty standards.
Here’s what you need to think through before deciding:
Here’s what you need to think through before deciding:
1. Roof Slope and Pitch
The steeper the slope, the faster water sheds—and the less likely it is to pool. For high-pitched roofs, traditional synthetic or felt underlayment often works well. But low-slope or nearly flat roofs (see our Flat Roof Services for more info) need underlayment with enhanced waterproofing, like self-adhered membranes or rubberized asphalt, to prevent standing water from seeping through.
2. Regional Climate (Heat, Humidity, Snow, Wind)
Climate plays a big role in underlayment performance. In hot, humid regions like Florida or Texas, you’ll want materials that resist heat, won’t wrinkle under intense sun, and allow moisture to escape. In cold or snowy zones, look for products with strong ice and water shielding—especially near eaves and valleys.
Key climate considerations:
- High wind zones: Look for tear-resistant synthetic or peel-and-stick options
- Wildfire-prone areas: Use fire-rated underlayments
- Freeze/thaw cycles: Prioritize waterproof membranes over felt
3. Local Building Codes and Compliance
Each jurisdiction has its own roofing codes—some more strict than others. For example, certain Florida counties require self-adhering underlayments on homes within wind-borne debris regions. Always confirm whether your selected product meets local code and inspection requirements.
4. Warranty Compatibility
Each jurisdiction has its own roofing codes—some more strict than others. For example, Florida roofing underlayment requirements mandate specific materials and application methods in High-Velocity Hurricane Zones (HVHZ), including the use of self-adhered membranes in many counties. Always confirm whether your selected product meets local code and inspection requirements.
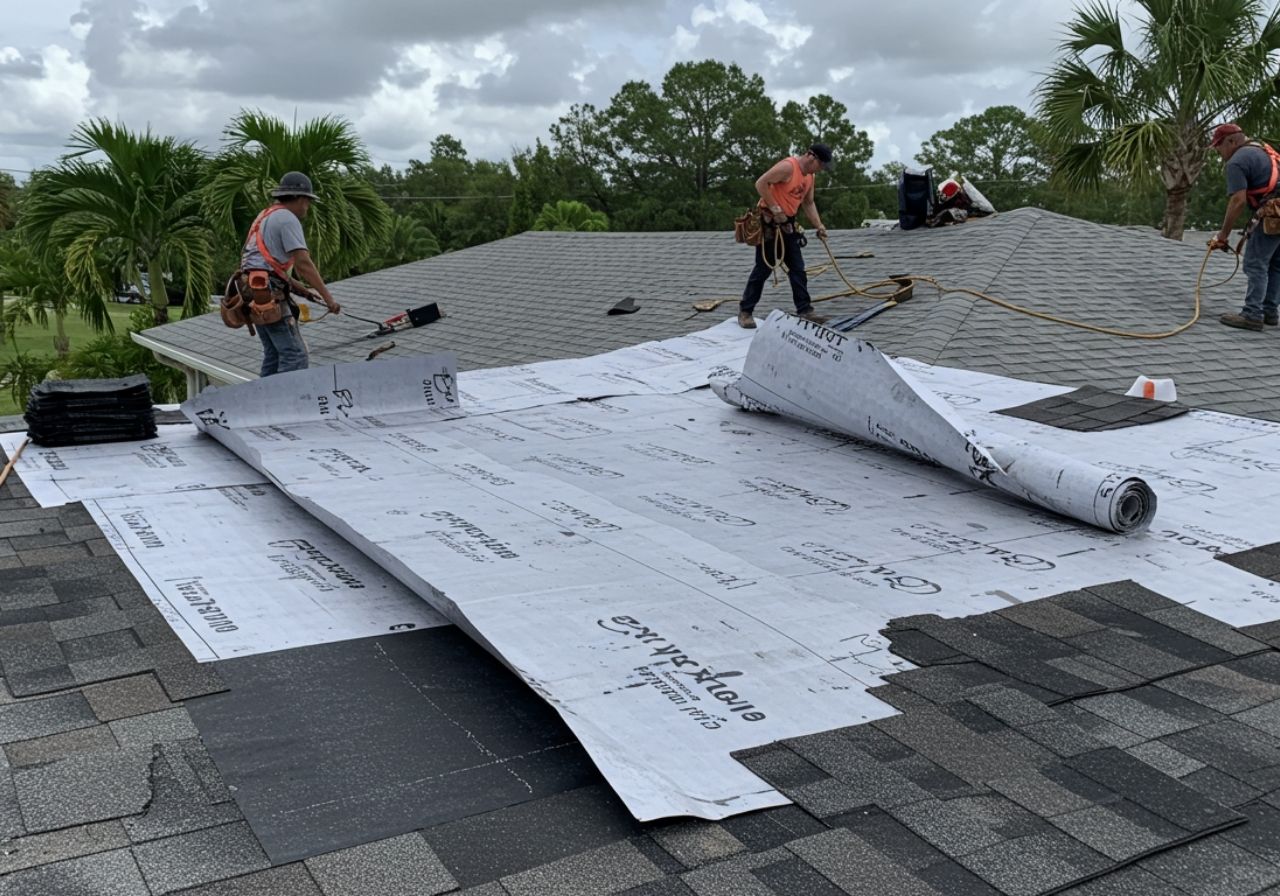
Best Underlayment for Asphalt Shingle Roofs
Asphalt shingles remain one of the most popular roofing materials for both residential and light commercial buildings—but their performance heavily depends on selecting the best roof underlayment for residential roofing to support long-term durability.
The underlayment layer acts as your first line of defense if shingles lift, crack, or fail during extreme weather. Choosing the right one can mean the difference between a minor repair and a major water intrusion issue.
For asphalt shingle roofs—such as those installed via our Asphalt Shingle Roofing service—the two most common underlayment options are felt (also called tar paper) and synthetic underlayment. Each has its strengths, but they perform very differently under real-world conditions, which is why understanding synthetic vs felt roof underlayment is key when choosing materials.
Felt vs. Synthetic: Pros and Cons
| Feature | Felt Underlayment | Synthetic Underlayment |
| Material | Asphalt-saturated organic mat | Polypropylene or polyethylene woven fabric |
| Weight | Heavier and bulkier | Lightweight and easier to handle |
| Water Resistance | Water-resistant (not waterproof) | Water-shedding and often waterproof-rated |
| Durability | Prone to tearing, wrinkling, and UV damage | Highly tear-resistant and UV-stable |
| Walkability | Slippery when wet | Grippy surface for safer installation |
| Installation Speed | Slower, requires careful handling | Fast roll-out, fewer seams |
| Cost | Less expensive upfront | Higher initial cost, better long-term value |
| Best Use Case | Short-term projects, dry climates | Long-term protection, harsh weather zones |
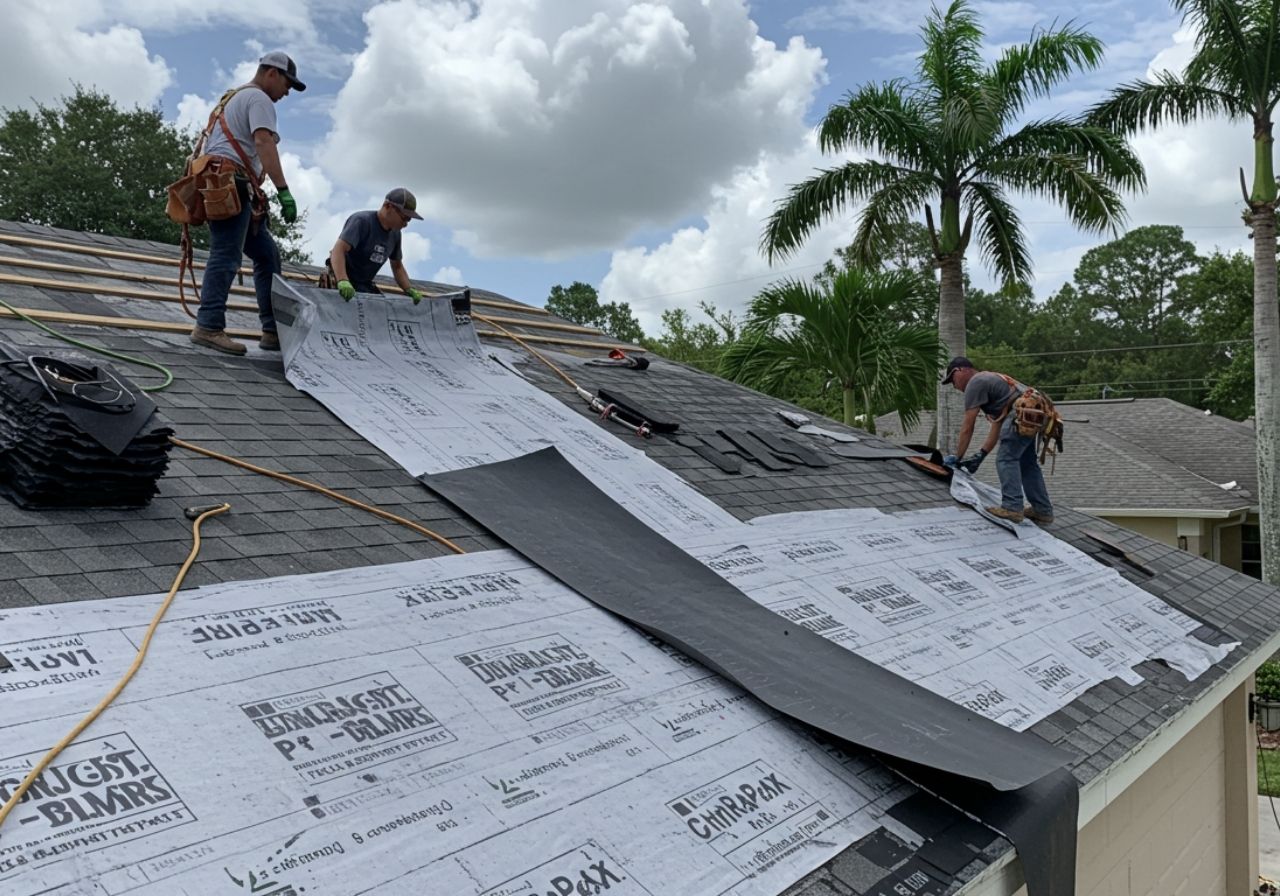
Why Synthetic Often Wins in Hot or Humid Climates
In regions like Florida or the Gulf Coast—where heat, humidity, and hurricanes are common—synthetic underlayment is generally the better choice. It holds up better under UV exposure, won’t absorb moisture like felt can, and provides superior resistance against tearing during high winds or installation.
It’s also less likely to wrinkle or buckle, which means your shingles will lay flatter and seal more effectively—one of the many pros and cons of synthetic and felt underlayment worth considering.
This can be a major advantage if you’re investing in long-life shingles or extended warranties, as poor underlayment installation can shorten your roof’s performance lifespan.
When Felt Still Makes Sense
While synthetic dominates in performance, felt underlayment can still be a cost-effective option for steep-slope roofs in dry, moderate climates or for temporary structures. It’s also sometimes used under basic shingle installations when budget constraints are tight and code allows.
Takeaway: For most asphalt shingle roofs—especially in hot, humid, or storm-prone areas—synthetic underlayment offers stronger protection, better performance, and fewer risks during and after installation. Felt may still have a role in certain scenarios, but synthetic has become the modern standard for long-term value.
Underlayment Options for Metal Roofs
Metal roofs are known for their durability, energy efficiency, and long lifespan—but to perform at their best, they require the right underlayment for metal roofing systems beneath the panels.
Unlike asphalt shingles, metal roofing expands and contracts with temperature swings and can transmit noise and heat more readily. The underlayment you choose plays a key role in addressing those challenges and ensuring lasting protection.
When it comes to metal roofing—like those installed through our Metal Roofing Services—two of the most common underlayment choices are synthetic underlayment and self-adhered membranes. Both serve different purposes and can be used individually or layered together depending on the roof’s design and exposure risks.
Key Performance Considerations for Metal Roof Underlayment
Here’s what matters most when selecting an underlayment for metal systems:
- Moisture Resistance:
Metal roofs can shed water quickly, but if seams or fasteners fail, trapped condensation can become a problem. Look for underlayments that resist moisture buildup and offer waterproofing support, especially in areas with high humidity. - Thermal Expansion & Contraction:
Metal expands and contracts significantly with temperature changes. Underlayment must be flexible and durable enough to move with the panels without tearing or buckling over time. - Fire Rating:
In wildfire-prone regions or where local code requires it, choose a fire-rated underlayment. Many high-performance synthetic and self-adhered membranes meet Class A fire resistance standards when used as part of a tested assembly. - Noise Reduction:
Rain on a metal roof can be loud without the right underlayment. Certain thicker synthetic products or self-adhered membranes can dampen sound and improve indoor comfort—especially in residential settings.
Self-Adhered vs. Synthetic: What’s the Difference?
- Synthetic Underlayment:
Lightweight, breathable, and tear-resistant. Ideal for everyday installations in moderate climates and for steep-slope residential metal roofs. - Self-Adhered Membranes:
Rubberized asphalt-based materials that stick directly to the roof deck, forming a watertight seal. Best for low-slope applications, coastal areas, or zones with heavy rain and wind-driven moisture.
Takeaway: Metal roofs demand underlayments that go beyond the basics. Whether you’re installing on a home in a quiet neighborhood or a commercial facility in a hurricane zone, choosing the right underlayment—synthetic, self-adhered, or both—ensures your metal roofing system performs reliably for decades.
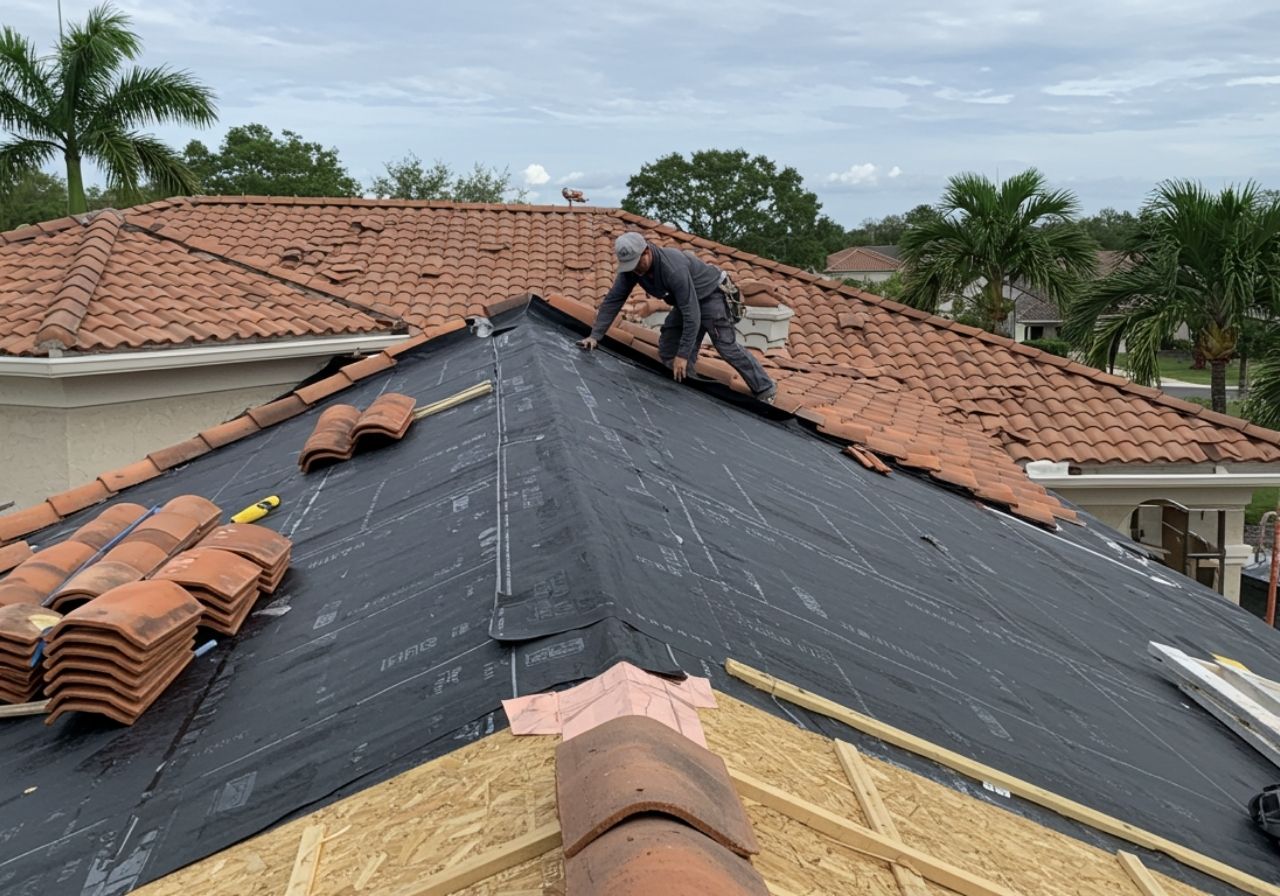
What to Use Under Tile or Slate Roofs
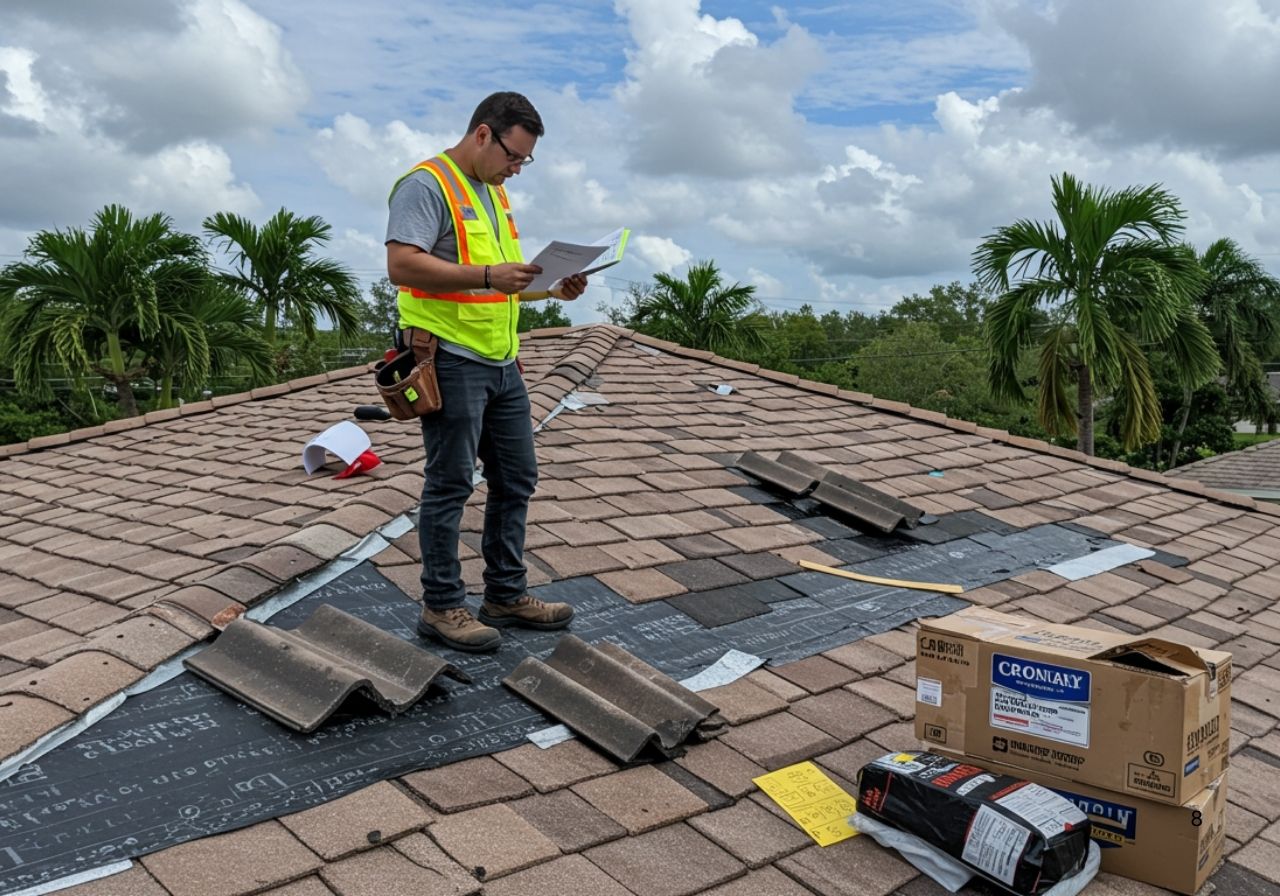
Tile and slate roofs are prized for their classic look and exceptional lifespan—often lasting 50 to 100 years or more. But these heavy, high-end materials place unique demands on the layers beneath them. Choosing the wrong underlayment can lead to premature leaks, structural damage, or even voided warranties long before the tiles themselves wear out.
Because of the extended service life of tile and slate, your underlayment needs to be just as durable—or easily maintainable over time. That means opting for high-performance materials designed to resist heat, moisture, and mechanical wear. For more on installing quality tile roofs, check out our Tile Roof Services.
Why Tile & Slate Roofs Require Specialized Underlayment
Here are the key reasons standard underlayments usually don’t cut it:
- Weight & Pressure:
Clay and slate tiles are significantly heavier than shingles or metal. The underlayment must be able to support that weight without tearing or compressing over time. - High Heat Exposure:
In sun-exposed areas, heat can build up beneath tiles. Underlayment materials must be heat-resistant and stable to avoid deterioration or warping, especially if used as a high-temperature roof underlayment for solar panels installed on sunny exposures. - Long-Term Moisture Defense:
Tile roofs are not 100% waterproof—water can penetrate between gaps or around fasteners. The underlayment serves as the primary waterproofing layer and must hold up for decades.
Recommended Underlayment Systems for Tile & Slate
Many professionals recommend multi-layer underlayment systems for tile or slate installations. A common approach includes:
- Base Layer: High-temp synthetic or modified bitumen underlayment to handle heat and moisture.
- Secondary Layer (Optional): An additional moisture barrier or slip sheet to reduce friction between tile and underlayment.
- Flashing & Detailing: Reinforced areas around valleys, hips, and penetrations for leak protection.
Some contractors also use peel-and-stick membranes in key areas (e.g., roof edges or valleys) to provide extra waterproofing protection.
Takeaway: Under tile or slate roofs, your underlayment needs to go the distance. Prioritize materials that offer heat resistance, durability, and layered moisture protection to match the long lifespan of your premium roof system.
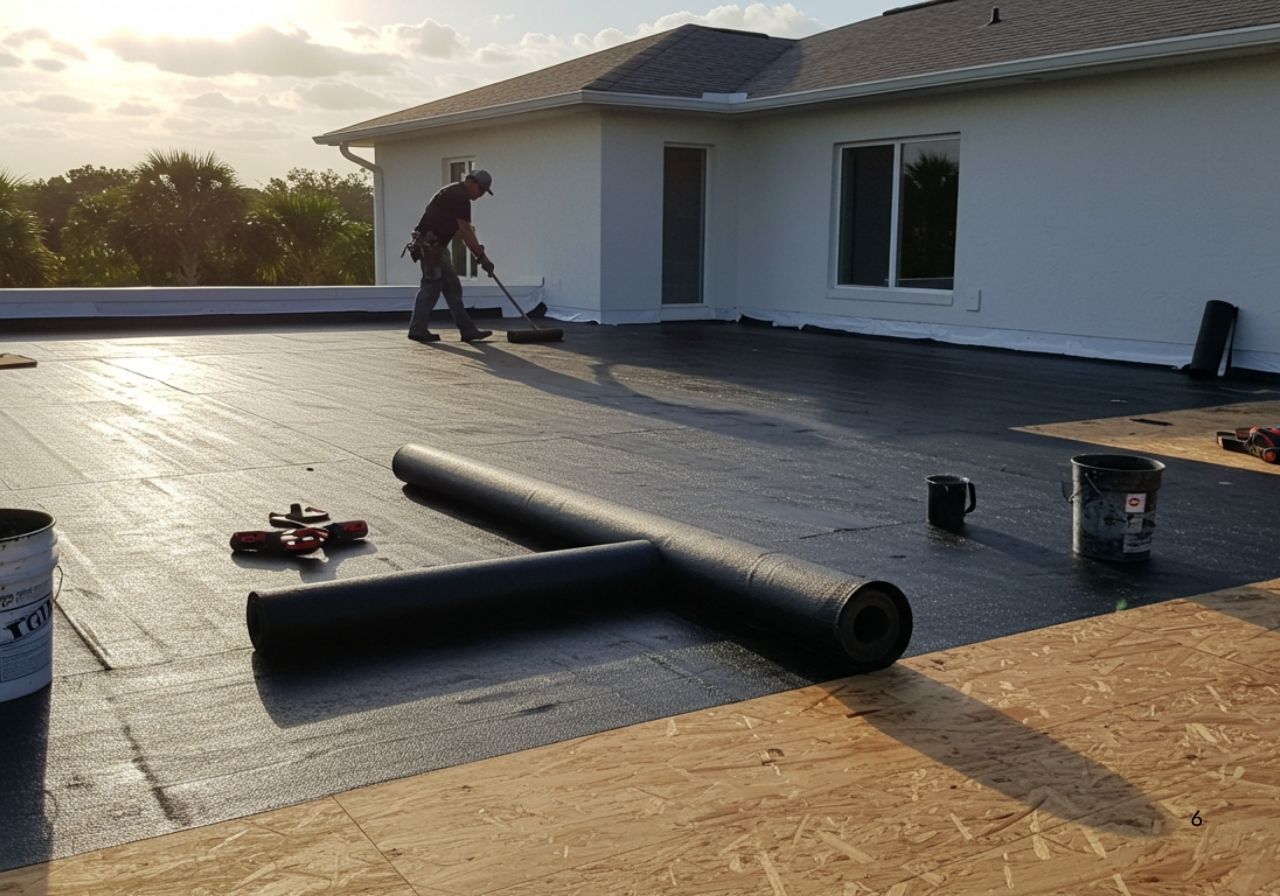
Choosing the Right Underlayment for Low-Slope Roofs
Low-slope and flat roofs come with their own set of challenges—chief among them is water management. Unlike steep-slope roofs that naturally shed rain, low-slope designs are prone to water pooling, slow drainage, and increased leak risk. That’s why choosing the right underlayment for these roofs is less about breathability and more about absolute waterproofing. Explore our Flat Roof Services to see solutions built for this exact need.
Low-slope roofs are common on commercial buildings, industrial facilities, and modern residential homes, making it essential to select the best roof underlayment for commercial buildings based on moisture resistance and thermal stress.
Whether you’re protecting a warehouse or a flat-roofed home addition, the right underlayment can be the difference between a watertight seal and recurring water damage.
Why Low-Slope Roofs Need Specialized Protection
Here’s what makes underlayment selection critical for these roof types:
- Increased Water Exposure:
Even small amounts of pooling can lead to long-term moisture intrusion—highlighting the need for a waterproof underlayment for flat roofs to prevent leaks. - Limited Gravity Drainage:
Since water doesn’t shed quickly, the roof’s surface and underlayment must resist standing water and wind-driven rain. - Higher UV and Thermal Stress:
Flat roof systems often absorb more heat and direct sunlight, accelerating material wear.
Best Underlayment Types for Low-Slope Roofs
For these applications, typical felt or lightweight synthetic underlayment is usually not enough. Instead, look for options like:
- Self-Adhered Membranes:
Rubberized asphalt or modified bitumen products that create a fully bonded, watertight seal with the roof deck. Ideal for areas where pooling is likely. - Bituminous Base Sheets:
Used in multi-layer systems for built-up or modified bitumen roofs. These sheets offer flexibility and durability over large, flat surfaces. - Liquid-Applied Membranes (for specialty cases):
Applied like paint and cured to form a continuous, seamless waterproof layer. Suitable for irregular or complex roof shapes.
Pro Tip: How to Prevent Leaks on Flat Roofs
Make sure your underlayment system overlaps properly at all seams and penetrations. Reinforce vulnerable areas—like drains, HVAC curbs, and parapet walls—with flashing or additional membrane layers. And always slope the deck slightly (even 1/4 inch per foot) to encourage runoff.
Takeaway: On low-slope roofs, waterproofing isn’t optional—it’s essential. Self-adhered membranes and modified bitumen systems offer the robust protection needed to withstand standing water, UV exposure, and temperature extremes. Always choose materials specifically engineered for low-slope performance.
Matching Underlayment to Your Climate Zone
Your local climate plays a major role in how well your roof—and the underlayment beneath it—performs over time. From scorching summers to deep freezes, every environment introduces unique stress factors. Choosing an underlayment that aligns with your regional weather conditions helps reduce premature wear, improve energy efficiency, and protect against costly leaks or structural damage.
Whether you’re in a hurricane-prone coastal region or a snow-heavy mountain zone, here’s how to tailor your underlayment choice to your climate.
Hot, Humid, and Hurricane-Prone Climates
In regions like Florida, the Gulf Coast, or Southern California, your roof must stand up to extreme heat, intense UV exposure, high humidity, and high winds. These conditions can degrade standard materials quickly or expose weaknesses in installation.
Recommended Underlayment Features:
- UV-resistant synthetics – Hold up better during extended sun exposure before the final roof is installed
- Self-adhered membranes – Help prevent wind-driven rain from getting under shingles or metal panels
- High-temperature tolerance – Essential to prevent wrinkling or warping beneath hot roofing materials like tile or metal
Bonus Benefit: Some premium underlayments also offer reflective or radiant barrier properties that help keep attics cooler and lower energy bills in hot climates.
Cold, Snowy, or Freeze-Thaw Zones
If your property is located in the Midwest, Northeast, or mountain regions, your roof faces challenges like ice dams, snow buildup, and frequent freeze-thaw cycles. Water that gets under roofing materials and then freezes can expand and cause serious structural issues.
Recommended Underlayment Features:
- Ice and water shield membranes – Self-adhered and waterproof, ideal for eaves, valleys, and other vulnerable areas
- Cold-weather flexibility – Look for materials that remain pliable and adhesive in low temps
- Synthetic or rubberized materials – Resist cracking or splitting during thermal contraction
Important Consideration: Many local building codes require ice barrier underlayment along the lower edges of the roof in snow zones—check your local code before you choose.
Climate-Material Match Chart (Suggested Visual Element)
| Climate Type | Recommended Underlayment |
| Hot & Humid | UV-resistant synthetic, radiant barrier, peel-and-stick |
| Hurricane-Prone | High-wind-rated synthetic + self-adhered membranes |
| Cold & Snowy | Ice & water shield, cold-flex synthetic |
| Freeze-Thaw Zones | Rubberized asphalt or multi-layer systems |
Takeaway: Your climate isn’t just background information—it’s one of the most important factors in selecting the right underlayment. Materials that excel in one region may fail in another, so always match your roofing system to your local weather challenges for maximum protection and performance.
Building Codes, Warranty Issues & Compliance Traps
Even the best roofing materials can fail if your underlayment doesn’t meet code—or worse, voids your warranty. That’s why choosing underlayment isn’t just about performance; it’s about compliance and protection. Overlooking local regulations or manufacturer requirements can lead to costly consequences, including denied insurance claims or required tear-offs.
Why Building Codes Matter
Local building codes exist to ensure that roofing systems are safe, weather-resistant, and properly constructed for your region’s conditions. These codes often specify:
- Minimum underlayment types based on roof pitch
- Required materials in hurricane, wildfire, or snow zones
- Installation techniques like fastening methods and overlaps
- Ice and water barrier requirements in cold climates
Example: In Florida’s High Velocity Hurricane Zones (HVHZ), self-adhered underlayment is often required to pass inspection. Using basic felt paper in these regions—even if it’s installed correctly—can result in a failed permit or forced redo.
The Risk of Voiding Your Warranty
Roofing manufacturers (whether for shingles, tiles, or metal panels) typically specify what underlayment types are compatible with their products. If your installer uses a non-approved material—even if it performs well—you may lose eligibility for long-term warranty coverage.
Common compliance mistakes:
- Installing felt under high-end shingles that require synthetic or rubberized membranes
- Using non-rated materials under fire-classified roofing systems
- Failing to install ice & water shield in required areas
Compliance & Warranty Checklist
Before purchasing or approving your underlayment, ask:
Does this underlayment meet local building codes for my area and roof type?
Is it approved by the roofing manufacturer for use with my shingles, metal, or tile?
Will this material help me maintain compliance for wind, fire, or snow-load ratings?
Is my installer using the correct overlap, fastening, and layering method per code?
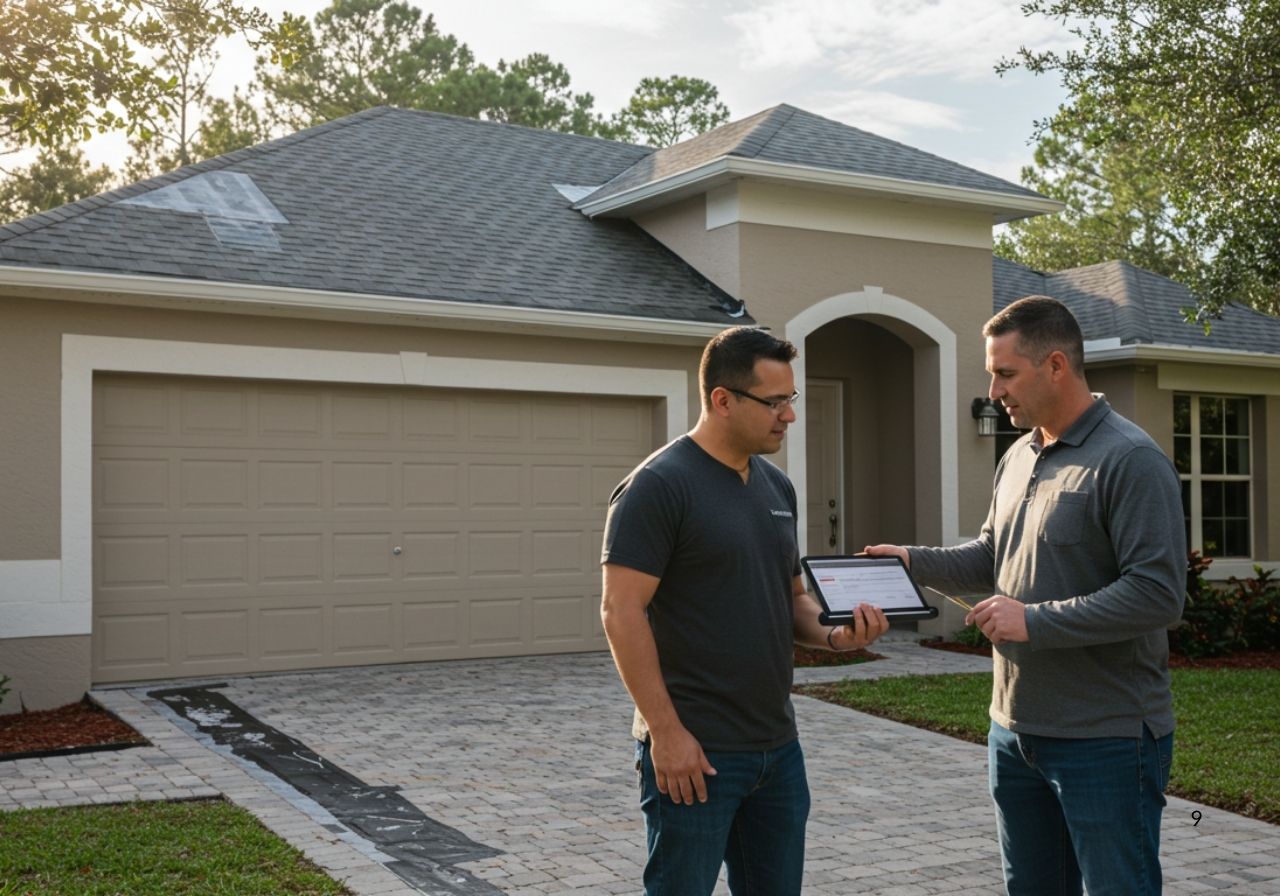
Takeaway: The wrong underlayment isn’t just a missed opportunity—it’s a potential liability. To protect your roof investment and ensure code and warranty compliance, always verify product requirements before installation begins. For expert guidance or help meeting local regulations, Contact Us.
Conclusion: Make the Right Choice for Long-Term Protection
When it comes to protecting your home or commercial property, the underlayment you choose plays a far greater role than most people realize. It’s not just a technical layer—it’s the barrier that shields your structure from water intrusion, heat buildup, and long-term wear. And as we’ve seen, making the right choice depends on a thoughtful balance of factors.
Your roofing material—whether it’s asphalt shingles, metal, tile, or slate—should always guide your underlayment selection. But that’s just the start. You also need to account for your climate, your roof pitch, your building type, and even the fine print in your warranty and local code requirements.
Here’s a quick recap of what matters most:
- Steep vs. low-slope roofs require different levels of waterproofing and durability.
- Hot, humid, or storm-prone areas benefit from high-performance synthetic and self-adhered membranes.
- Cold regions demand ice and water barriers and flexible materials that resist cracking.
- Tile and slate roofs need underlayments built to last as long as the roofing itself.
- Building codes and manufacturer warranties can limit or dictate your options—compliance isn’t optional.
If you’re unsure, remember: every roof has its own set of challenges. And while there’s no universal answer, there is a right solution for your specific situation. Taking the time to choose carefully—and consulting with experienced professionals when needed—helps ensure your roofing system performs as intended for years to come.
Frequently Asked Questions
In hot, humid climates—like Florida or the Gulf Coast—synthetic underlayment is generally the best choice. It resists heat, won’t wrinkle or absorb moisture, and holds up better under intense sun exposure than traditional felt. Some advanced synthetics also offer UV protection and improved walkability during installation.
Yes. Metal roofs expand and contract more than shingles and often require self-adhered membranes or high-performance synthetic underlayments to manage thermal movement and moisture protection. Shingle roofs typically use felt or synthetic options, but they don’t need the same thermal flexibility.
Steep-slope roofs shed water quickly and can use standard synthetic or felt underlayments. Low-slope or flat roofs, however, are more prone to water pooling and require fully waterproof systems, like peel-and-stick membranes or modified bitumen, to prevent leaks.
Absolutely. Most roofing manufacturers have specific underlayment requirements listed in their warranty documents. If the installed underlayment doesn’t meet those specs—or isn’t approved for use with the roofing product—you may risk voiding the warranty entirely.
In most cases, yes. Synthetic underlayment offers better tear resistance, lighter weight, UV stability, and water-shedding performance—making it worth considering alongside our roofing underlayment cost breakdown. While felt is less expensive upfront, synthetic materials typically last longer, install faster, and perform better in extreme weather conditions.