Roof Flashing Repair: Signs, Causes, Costs, and When to Fix It
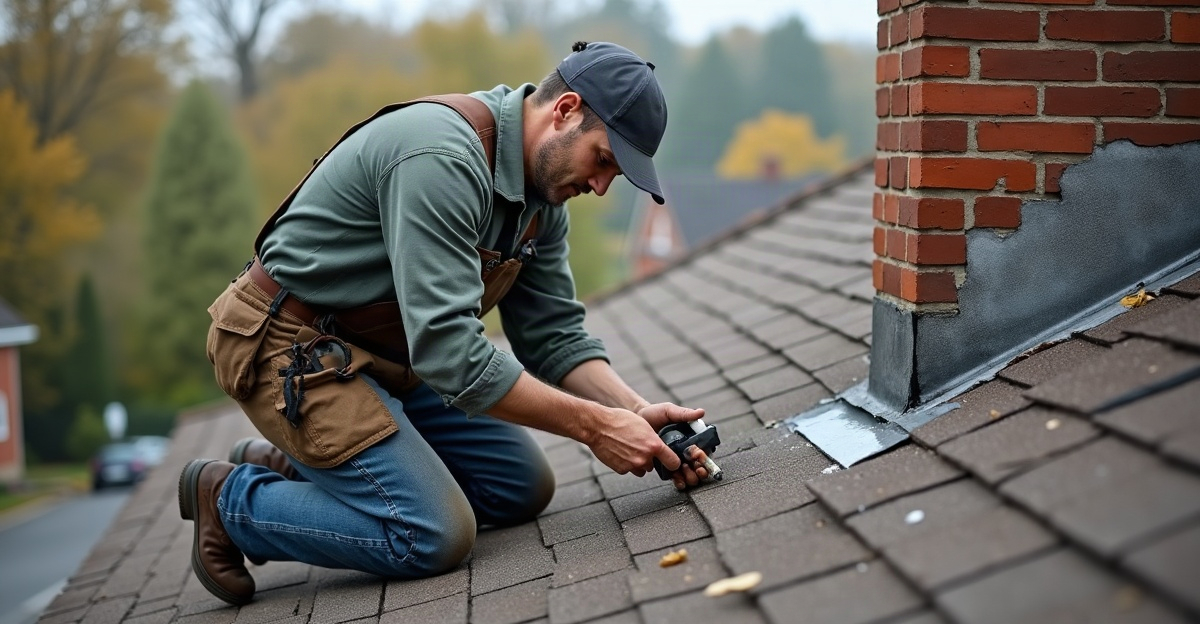
Roof flashing repair protects vulnerable joints around chimneys, skylights, vents, walls, valleys, and roof penetrations. Damaged metal or failed sealant can allow water into the building. Active leaks, spreading stains, loose or missing flashing, and recurring leaks after patching need a prompt inspection. We identify the true source, stop water intrusion, and limit hidden damage.
Key Takeaways
- Water can move through decking, insulation, and framing. A visible ceiling stain may sit far from the actual leak source.
- Flashing often fails because of corrosion, wind or storm damage, thermal movement, failed fasteners, cracked sealant, poor installation, or aging materials.
- Resealing can resolve minor gaps when flashing remains secure and sound. Rusted, missing, loose, or incorrectly installed flashing usually needs repair or replacement.
- Repair costs vary based on roof access, pitch, flashing location and material, nearby shingle or membrane repairs, and hidden water damage.
- Avoid unsafe roof access. Document leaks and visible damage, protect belongings from active drips, and contact a professional immediately if water reaches electrical components.
Know When Flashing Damage Needs Prompt Repair
Roof flashing repair should move quickly when water is actively entering the building or flashing has visibly failed. Active drips, spreading ceiling or wall stains, missing flashing, separated metal, loose pieces, storm damage, and recurring leaks all call for a prompt assessment.
Water near electrical fixtures, panels, or wiring needs immediate attention. Keep clear of the area and avoid handling wet electrical components. A small crack in sealant may not create an emergency, but leaking roof flashing or visible roof flashing damage can allow water to move well beyond the point of entry.
Water often reaches decking, insulation, walls, ceilings, and structural framing before indoor damage becomes obvious. Waiting can turn a focused repair into a larger restoration project.
During an active leak, we recommend protecting belongings, placing containers below drips where it is safe, and documenting stains or visible exterior damage with photos. Avoid climbing onto a wet, steep, high, or storm-damaged roof. Our storm damage repair team can assess urgent conditions and help stop water intrusion safely.
Common signs of damaged flashing include:
- Water entering during or shortly after rain.
- New or expanding stains on ceilings and walls.
- Metal flashing that has lifted, shifted, cracked, or pulled away.
- Missing flashing near a chimney, skylight, wall, vent, or valley.
- Repeat leaks after previous patching or sealant work.
Spot the Warning Signs and Confirm the True Leak Source
Flashing is a common source of roof leaks, but a stain indoors does not automatically mean flashing is at fault. Water can travel along decking, framing, insulation, or a roof slope before it appears inside. The visible stain may sit several feet away from the actual entry point.
Warning signs include water stains on a ceiling from roof leaks, peeling paint, damp attic insulation, musty odors, visible mold, rust, corroded flashing, loose metal, cracked sealant, and missing sections. Leaks that return after wind-driven rain are especially important to document.
A roof leak may also start at damaged shingles, membrane seams, valleys, underlayment, roof penetrations, gutters, condensation points, or other roofing components. That is why a proper roof leak inspection should examine the interior, attic space, flashing, and surrounding roof materials before work begins.
Before an inspection, document a few details. Note when the leak occurs, whether wind-driven rain triggers it, whether the stain is growing, and whether recent storms affected the roof. Those details help us trace how water is moving through the system.
For a clear starting point, use our roof inspection checklist to record visible conditions. We then confirm the true source before recommending roof flashing repair, so repairs address the problem rather than simply covering the symptom.
Where Flashing Fails and What Causes the Damage
Flashing directs water away from vulnerable roof joints. We install it around chimneys, skylights, vents, walls, valleys, pipe penetrations, and roof-to-wall connections. Each location needs the right material and correct overlap with the surrounding roofing system.
Step flashing consists of overlapping metal pieces that protect the joint where a sloped roof meets a wall. Counterflashing covers the top edge of base or step flashing, often at chimneys and masonry walls. Together, these parts are central to lasting chimney flashing repair.
Kick-out flashing is a small diverter at the bottom of a roof-to-wall connection. It sends water into the gutter instead of allowing runoff to soak siding or wall surfaces. A pipe boot is the flashing collar around a plumbing vent pipe. Pipe boot repair often becomes necessary when the collar cracks, splits, or pulls away from the pipe.
Apron flashing is a wider piece installed at the base of a wall, chimney, or dormer. Valley flashing protects the channel where two roof slopes meet. Skylight flashing repair also requires close attention because skylights depend on a complete, layered water-shedding system.
Labeled photos or simple diagrams can make these areas easier to understand during an inspection. They also help show whether the visible metal is the problem or whether a nearby roofing component has failed.
Age, corrosion, failed fasteners, cracked sealant, thermal movement, wind, and storm damage can all cause flashing to fail. Poor original installation is another frequent cause. Flashing may also break down where incompatible metals contact each other, debris holds moisture in place, the roof structure moves, or previous repairs were not integrated correctly with shingles or membrane materials.
Weather speeds up this wear. Our guide on weather and roof lifespan explains why repeated heat, rain, wind, and temperature changes deserve attention during maintenance planning.
Repair, Reseal, or Replace? Choosing the Right Scope of Work
Roof flashing repair versus replacement depends on the condition of the metal, the surrounding roofing, and the cause of the leak. A professional roof inspection helps determine whether a limited repair will remain dependable or whether replacement is the better long-term choice.
Resealing can work when flashing remains secure, correctly installed, and free of corrosion. Limited sealant repairs may also help address a small gap as part of routine maintenance. Caulk and roof cement have their place, but they are not a durable answer for loose metal, rusted sections, poor installation, or widespread roof flashing damage.
Repair may involve securing and resealing sound flashing, replacing a damaged section, or reinstalling flashing that was incorrectly integrated. Failed pipe boots usually need replacement rather than repeated patching. Many repairs also require removing and replacing nearby shingles or membrane materials so new flashing can overlap correctly and shed water as intended.
Roof flashing replacement becomes the practical choice when metal is extensively corroded, missing, bent beyond reuse, or improperly installed throughout the area. Broader roofing work may also be needed when leaks have damaged decking, shingles are failing, membrane seams have opened, several penetrations are aging, or the roof is nearing the end of its service life.
Flashing works as part of a complete roof assembly. The exposed metal is only one layer. Proper work may need to connect flashing with underlayment, shingles, masonry, wall coverings, or commercial membranes. Learn more about replacing roof underlayment when water intrusion has reached layers below the surface.
We recommend qualified assessment for steep, high, wet, aging, and commercial roofs. The same applies to leaks near electrical equipment. Unsafe DIY access can lead to serious injury and often misses hidden damage. For dependable repairs, schedule professional roof repair services that address the complete water path.
What Roof Flashing Repair Costs and What Affects Your Estimate
Roof flashing repair cost varies widely. A reliable price should come from an on-site assessment that confirms the leak source and shows how much surrounding roofing needs attention.
The cost to replace roof flashing depends on roof type, pitch, height, access, flashing material, location, repair size, and hidden water damage. Residential and commercial roof systems also have different installation methods, access needs, and material requirements.
Projects often stay on the lower end when flashing is easy to reach, damage is localized, resealing is appropriate, and no shingles, membrane, or decking need replacement. Costs increase with chimney or skylight work, steep or multi-story roofs, difficult access, heavy corrosion, hidden rot, damaged decking, complex commercial penetrations, and larger roofing or membrane replacement areas.
A transparent roof leak repair estimate should explain the confirmed leak source, repair scope, recommended materials, adjacent damage findings, access considerations, warranty details, and any potential permit or code issues. Chimney flashing repair cost can vary especially widely because masonry conditions, counterflashing, and surrounding roofing may all affect the scope.
Permits, code requirements, warranty implications, and insurance eligibility should be verified for the specific property and repair. Requirements differ by jurisdiction, roof system, manufacturer, and project scope. For additional planning guidance, review roof leak repair costs before comparing repair options.
Residential and Commercial Flashing Repairs: Different Risks, Same Need for Reliable Waterproofing
Residential roof flashing repair often focuses on chimneys, dormers, skylights, vent pipes, valleys, and roof-to-wall transitions. A small leak can affect family comfort, damage finishes, and create avoidable stress. Early repairs protect the home and help prevent a minor issue from becoming a larger project.
Commercial roof flashing repair commonly involves parapet walls, curbs, drains, HVAC penetrations, edge metal, and membrane transitions. Water intrusion can interrupt operations, affect tenants, damage inventory or equipment, and create budgeting concerns. Documentation also matters for maintenance records, insurance matters, compliance needs, and manufacturer warranty requirements.
Commercial repairs may require coordination around operating hours, tenant access, safety zones, and building systems. Our commercial roofing team helps property managers prioritize reliable waterproofing, clear documentation, and repairs that support long-term return on investment.
What to Do Before the Inspection
- Photograph stains, drips, loose flashing, and visible storm damage.
- Record when leaks occur and which weather conditions trigger them.
- Stay off steep, high, wet, aging, or otherwise unsafe roofs.
- Protect furniture, equipment, and stored belongings from active water.
- Schedule an inspection when the leak source or repair scope remains uncertain.
Whether the issue involves a home or business, prompt action limits water damage and protects the roofing system. We provide clear findings, practical repair recommendations, and a scope built around the condition of the roof—not a one-size-fits-all patch.